They say a knife is only as good as it is sharp, and a chef is only as good as its knife. Keeping your kitchen knives well maintained and properly sharpened is, to some, more important than how you use them. If you’re anything like us, your kitchen knives take far more use and abuse than your pocket knives do and they’re likely the least maintained and cared for.
This guide breaks down how to hone and sharpen a kitchen knife using everything from basic tools to advanced sharpening systems. Grab your kitchen knives, roll up your sleeves, and get ready to learn because things are about to get real! Let’s go!
Supplies
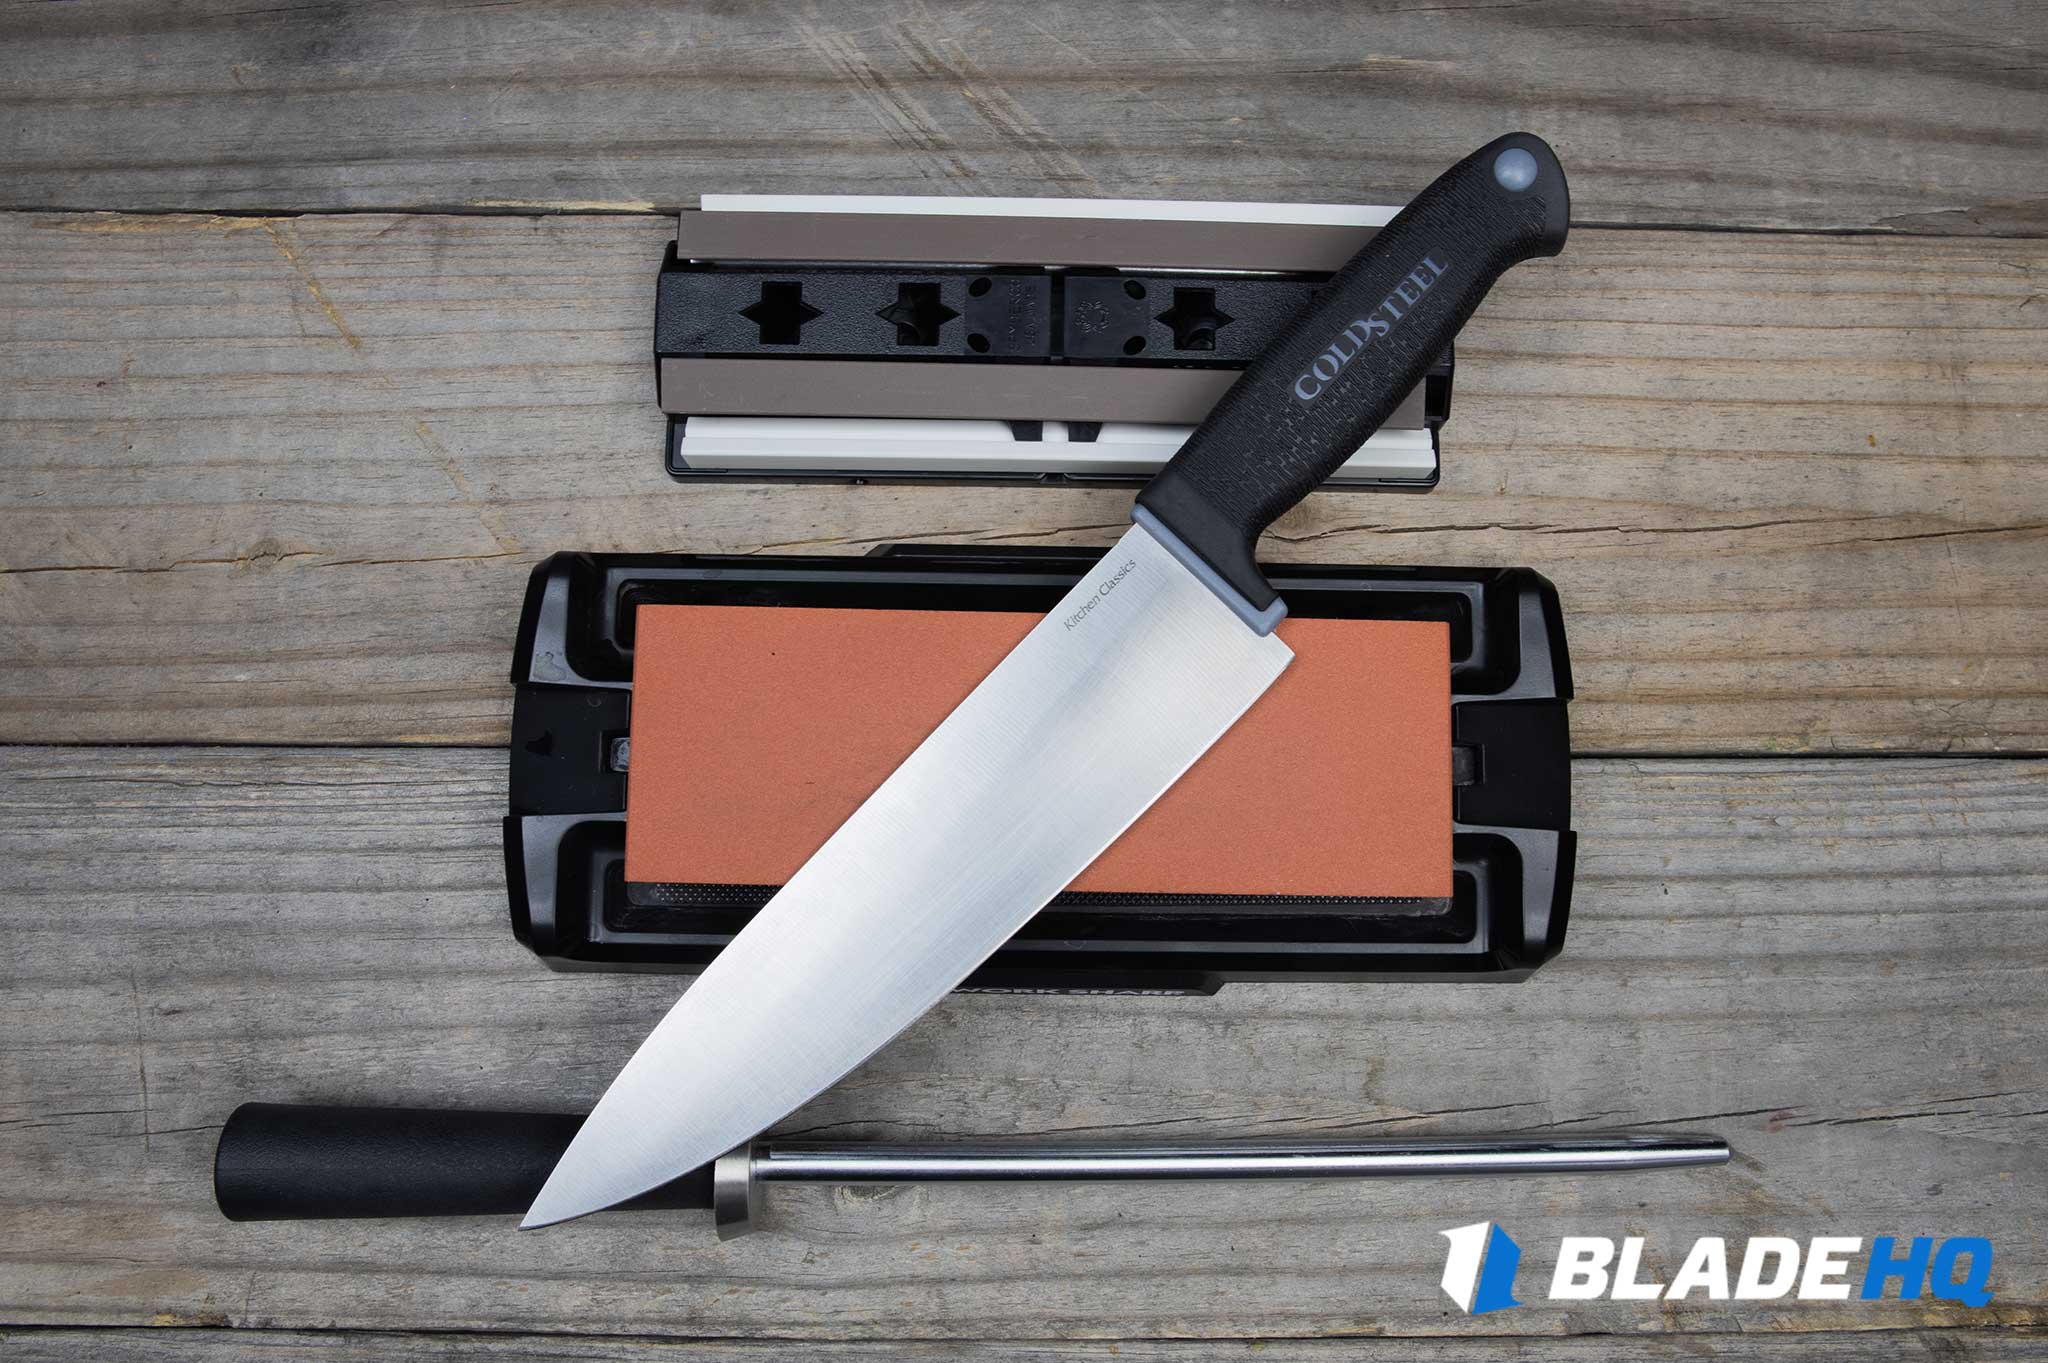
While basic kitchen knife maintenance can be done with a honing steel and a pull-thru sharpener like the Smith’s Sharpener’s Edge Pull-Thru Sharpener, taking the time to put a great edge on your kitchen knives can make all the difference in the long run and requires using the right tools.
What you’ll need to sharpen your knives includes:
- a sharpening system or sharpening stone set
- stropping compound
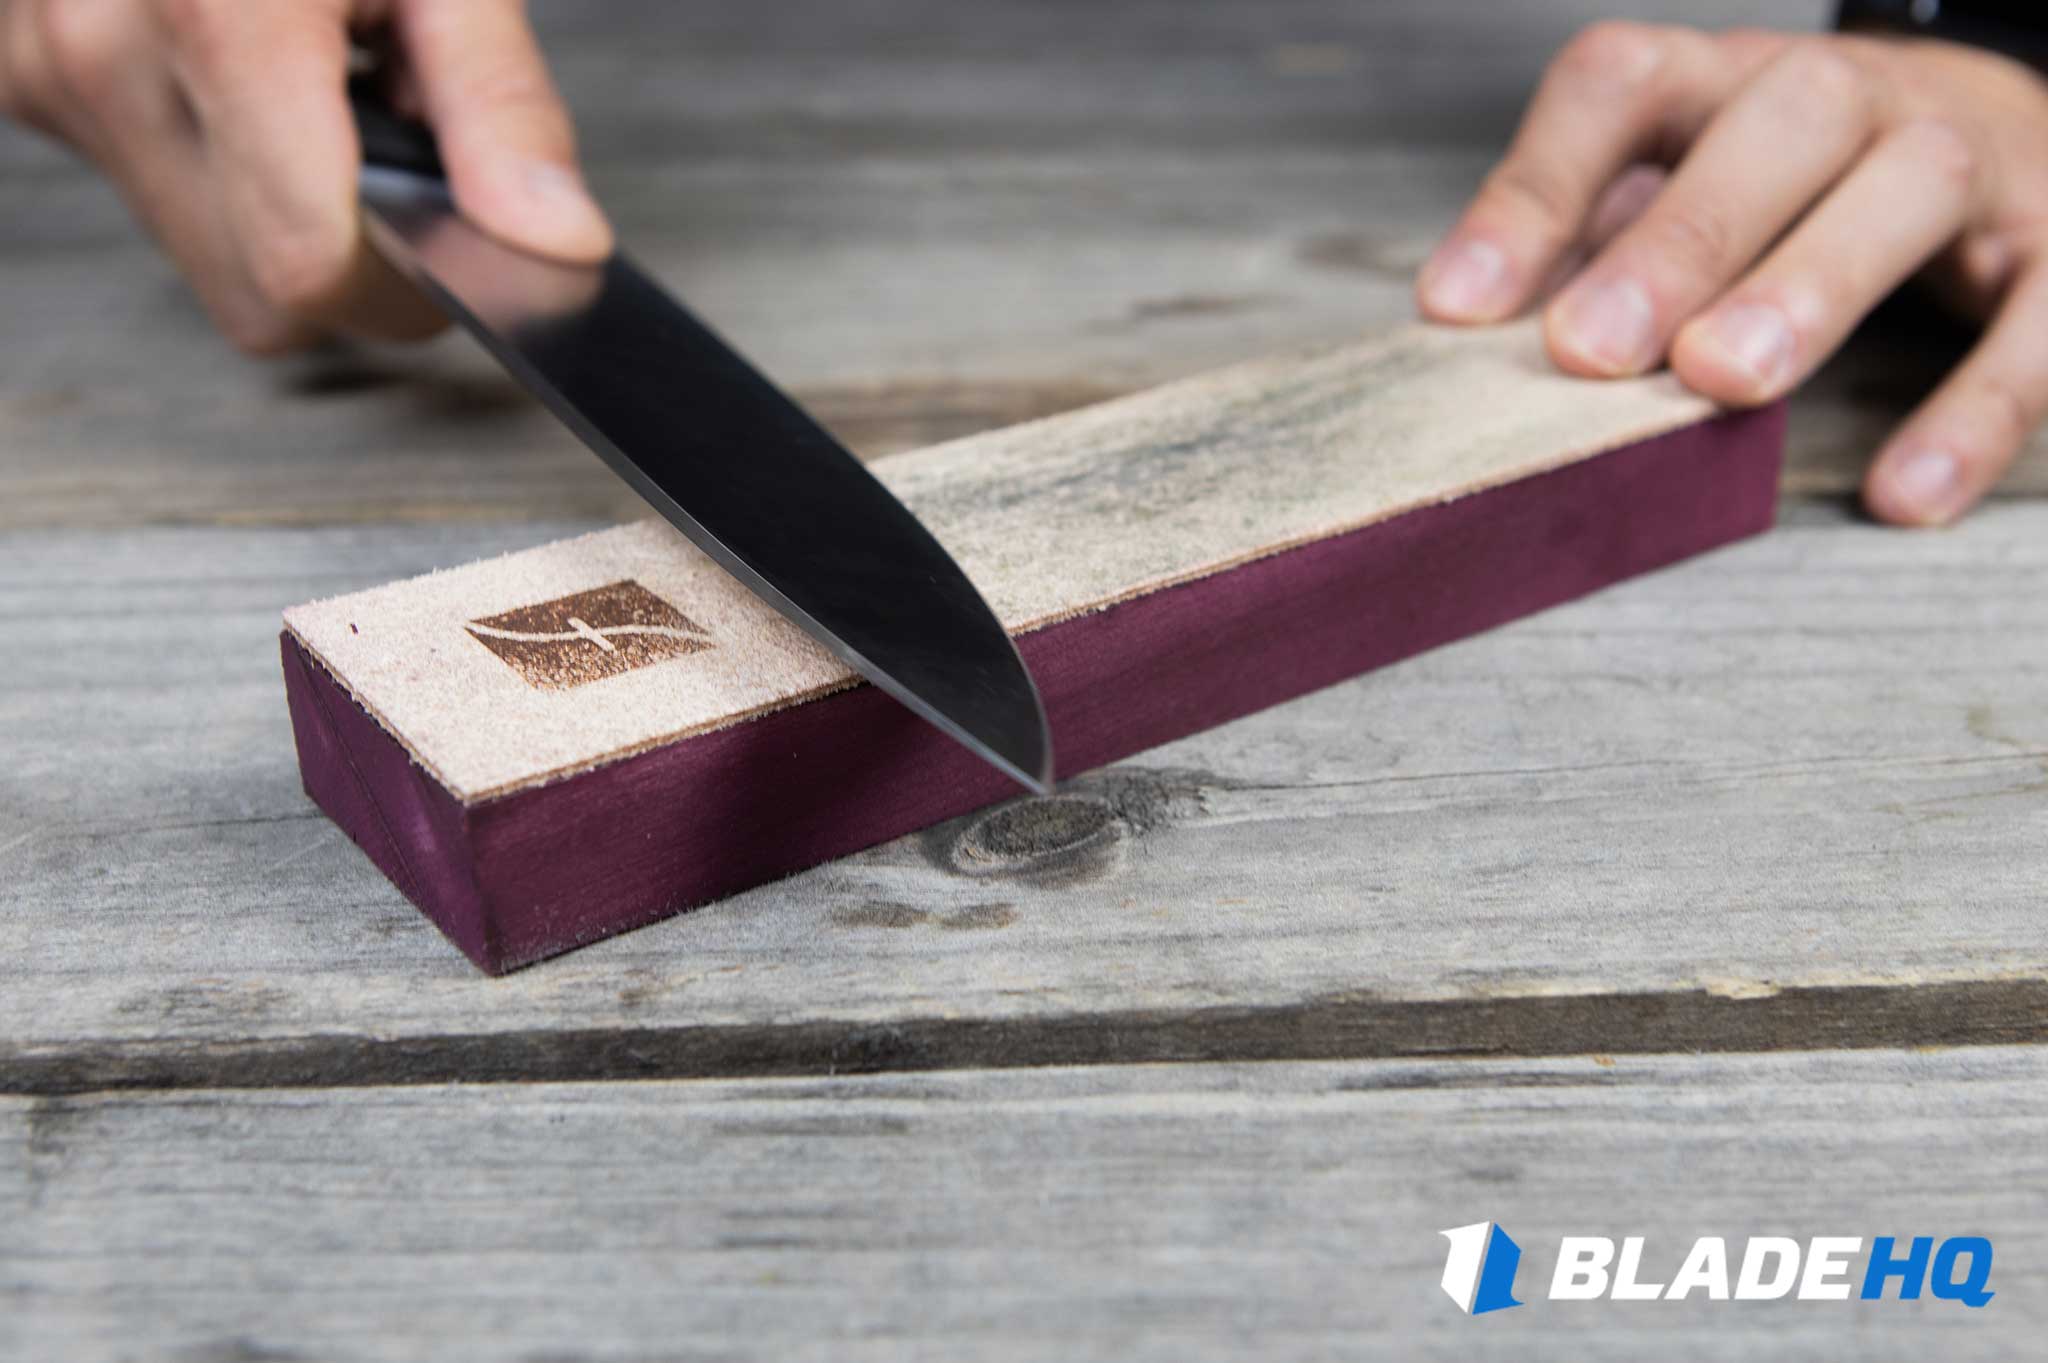
- leather strop
- bevel gauge (helpful the first couple times you sharpen, but not entirely necessary)
- patience and a relaxed afternoon
- a cold beverage 😉
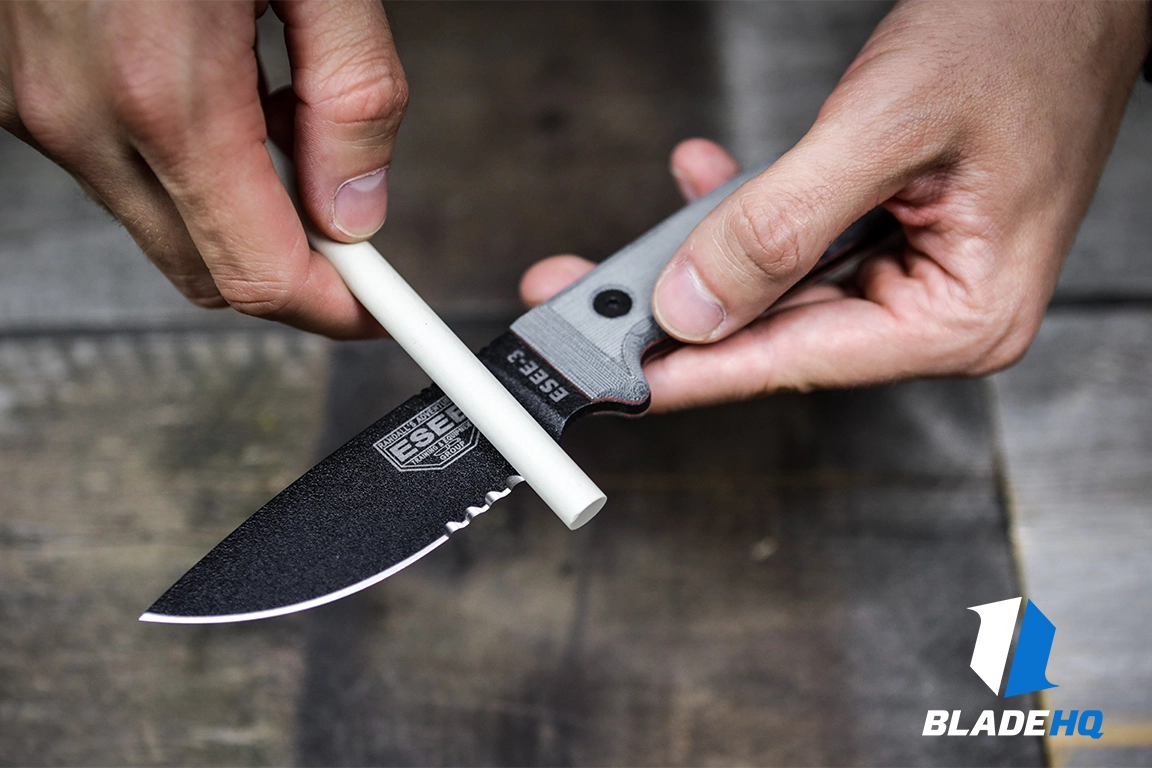
Method 1: Honing Steel
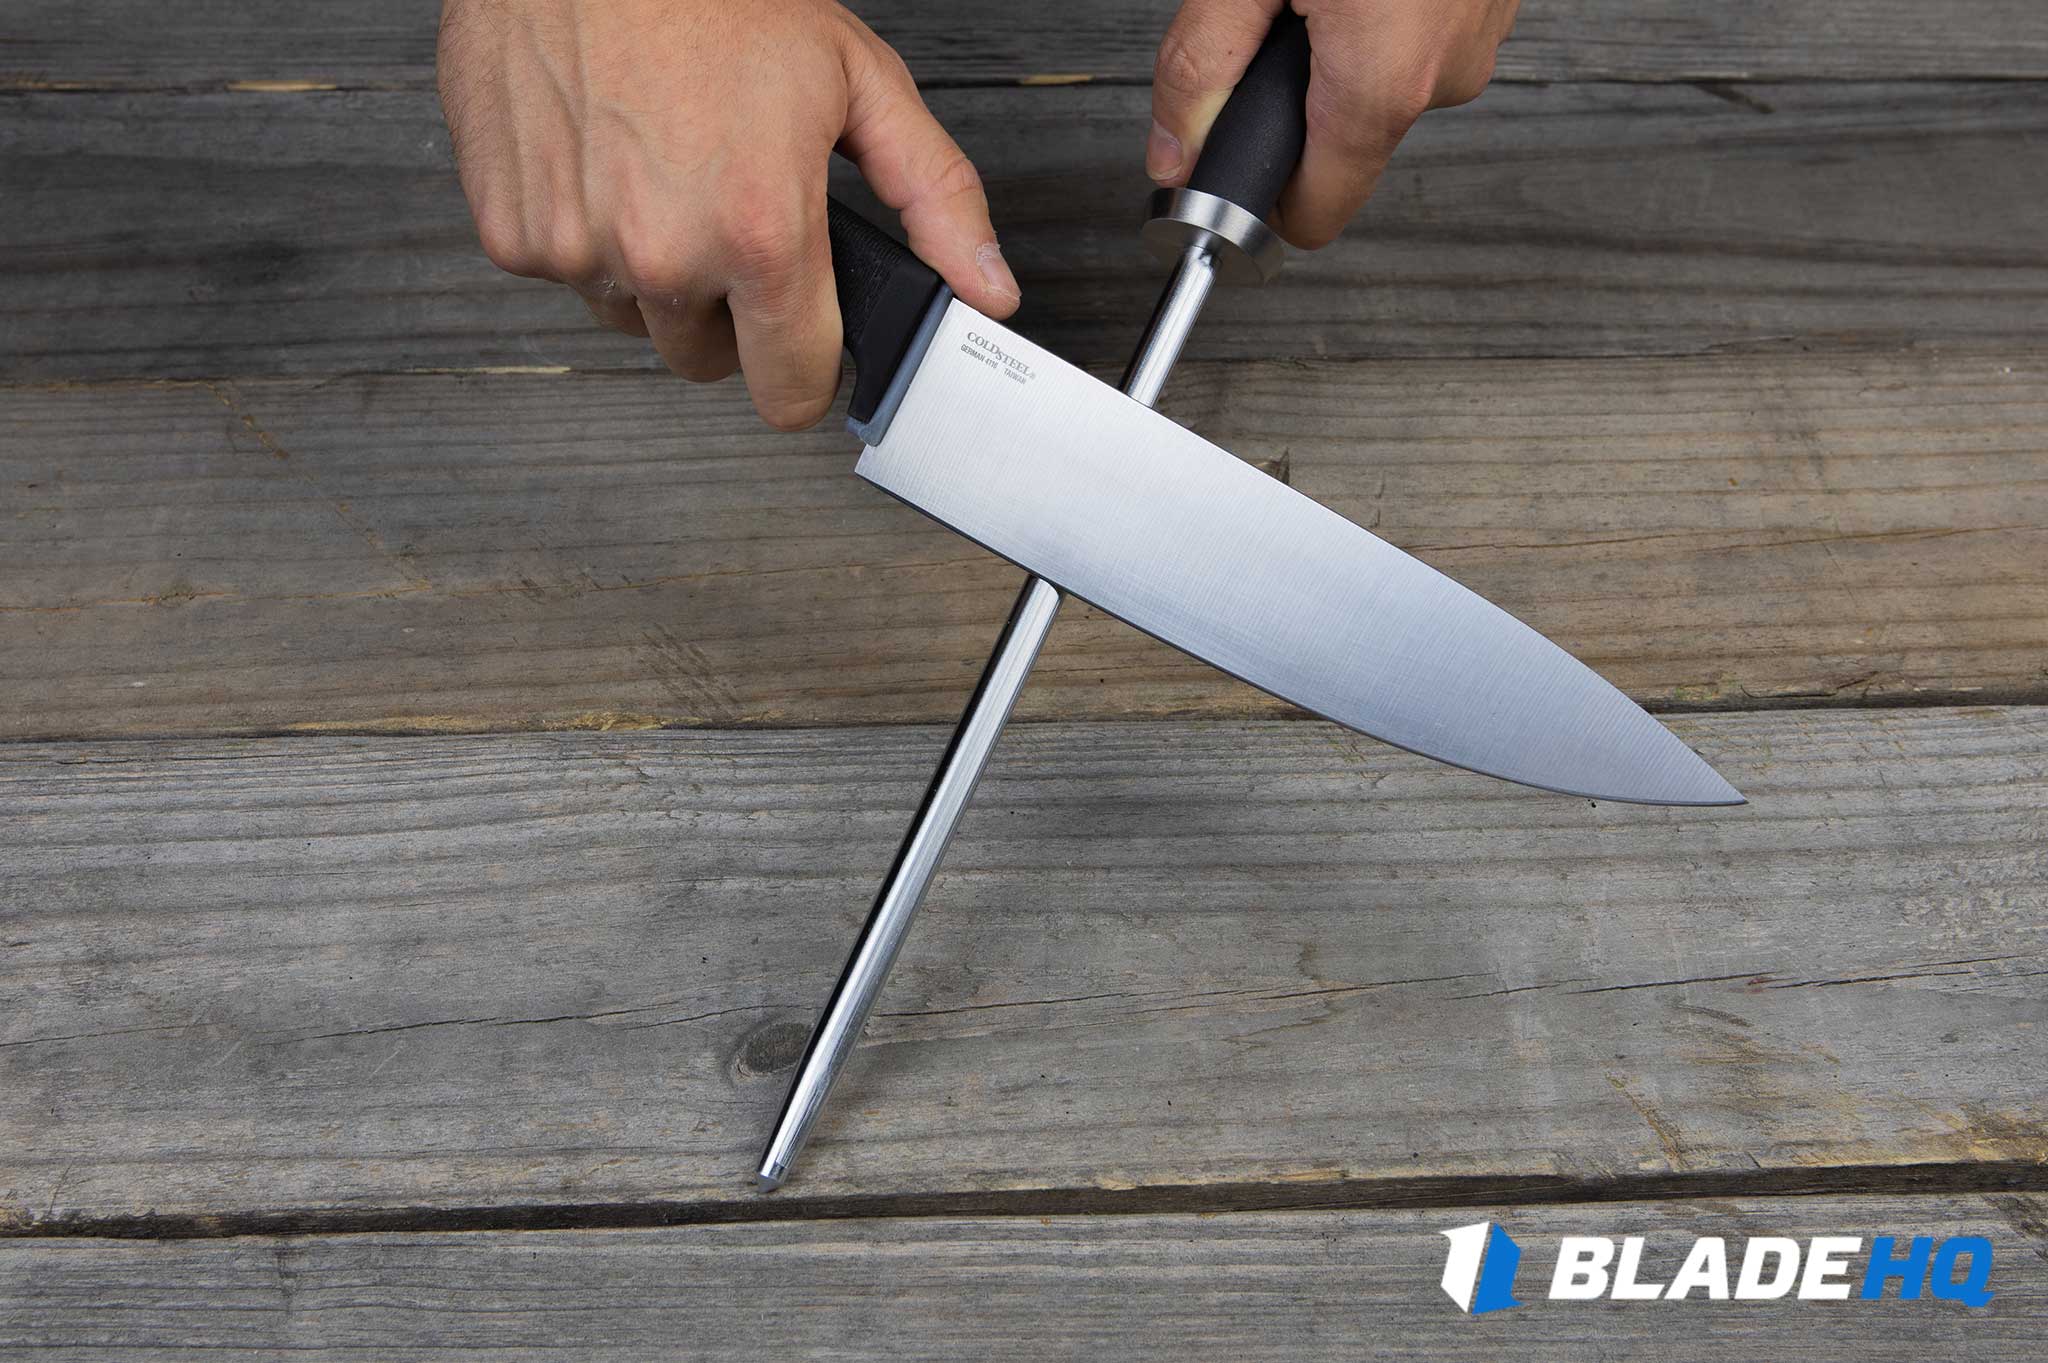
At its most basic, maintaining a kitchen knife can be done with the use of a honing steel. A honing steel is like it sounds, a piece of hardened steel, usually with a handle and a subtle grooved texture, used for aligning the edge of a kitchen knife.
When honing a kitchen knife, it’s important to understand that we aren’t actually sharpening the knife, but rather straightening the edge of the knife and adjusting the burr enough for it to make smoother cuts. If the edge of your knife doesn’t have much damage or looks like it’s in generally good condition, using a honing steel is a quick way to ready it for food prep. Let’s break down how to use a honing steel.
Steps:
- Examine the edge of your knife making note of any damage. An excessively damaged or dull blade will require the use of additional sharpening.
- With the honing steel in your non-dominant hand, place the tip on a flat surface at a comfortable angle.
- Holding the knife in your dominant hand, place the edge, facing away from you, on the honing steel at a 15º to 20º angle. Start with the blade at the base of the handle.
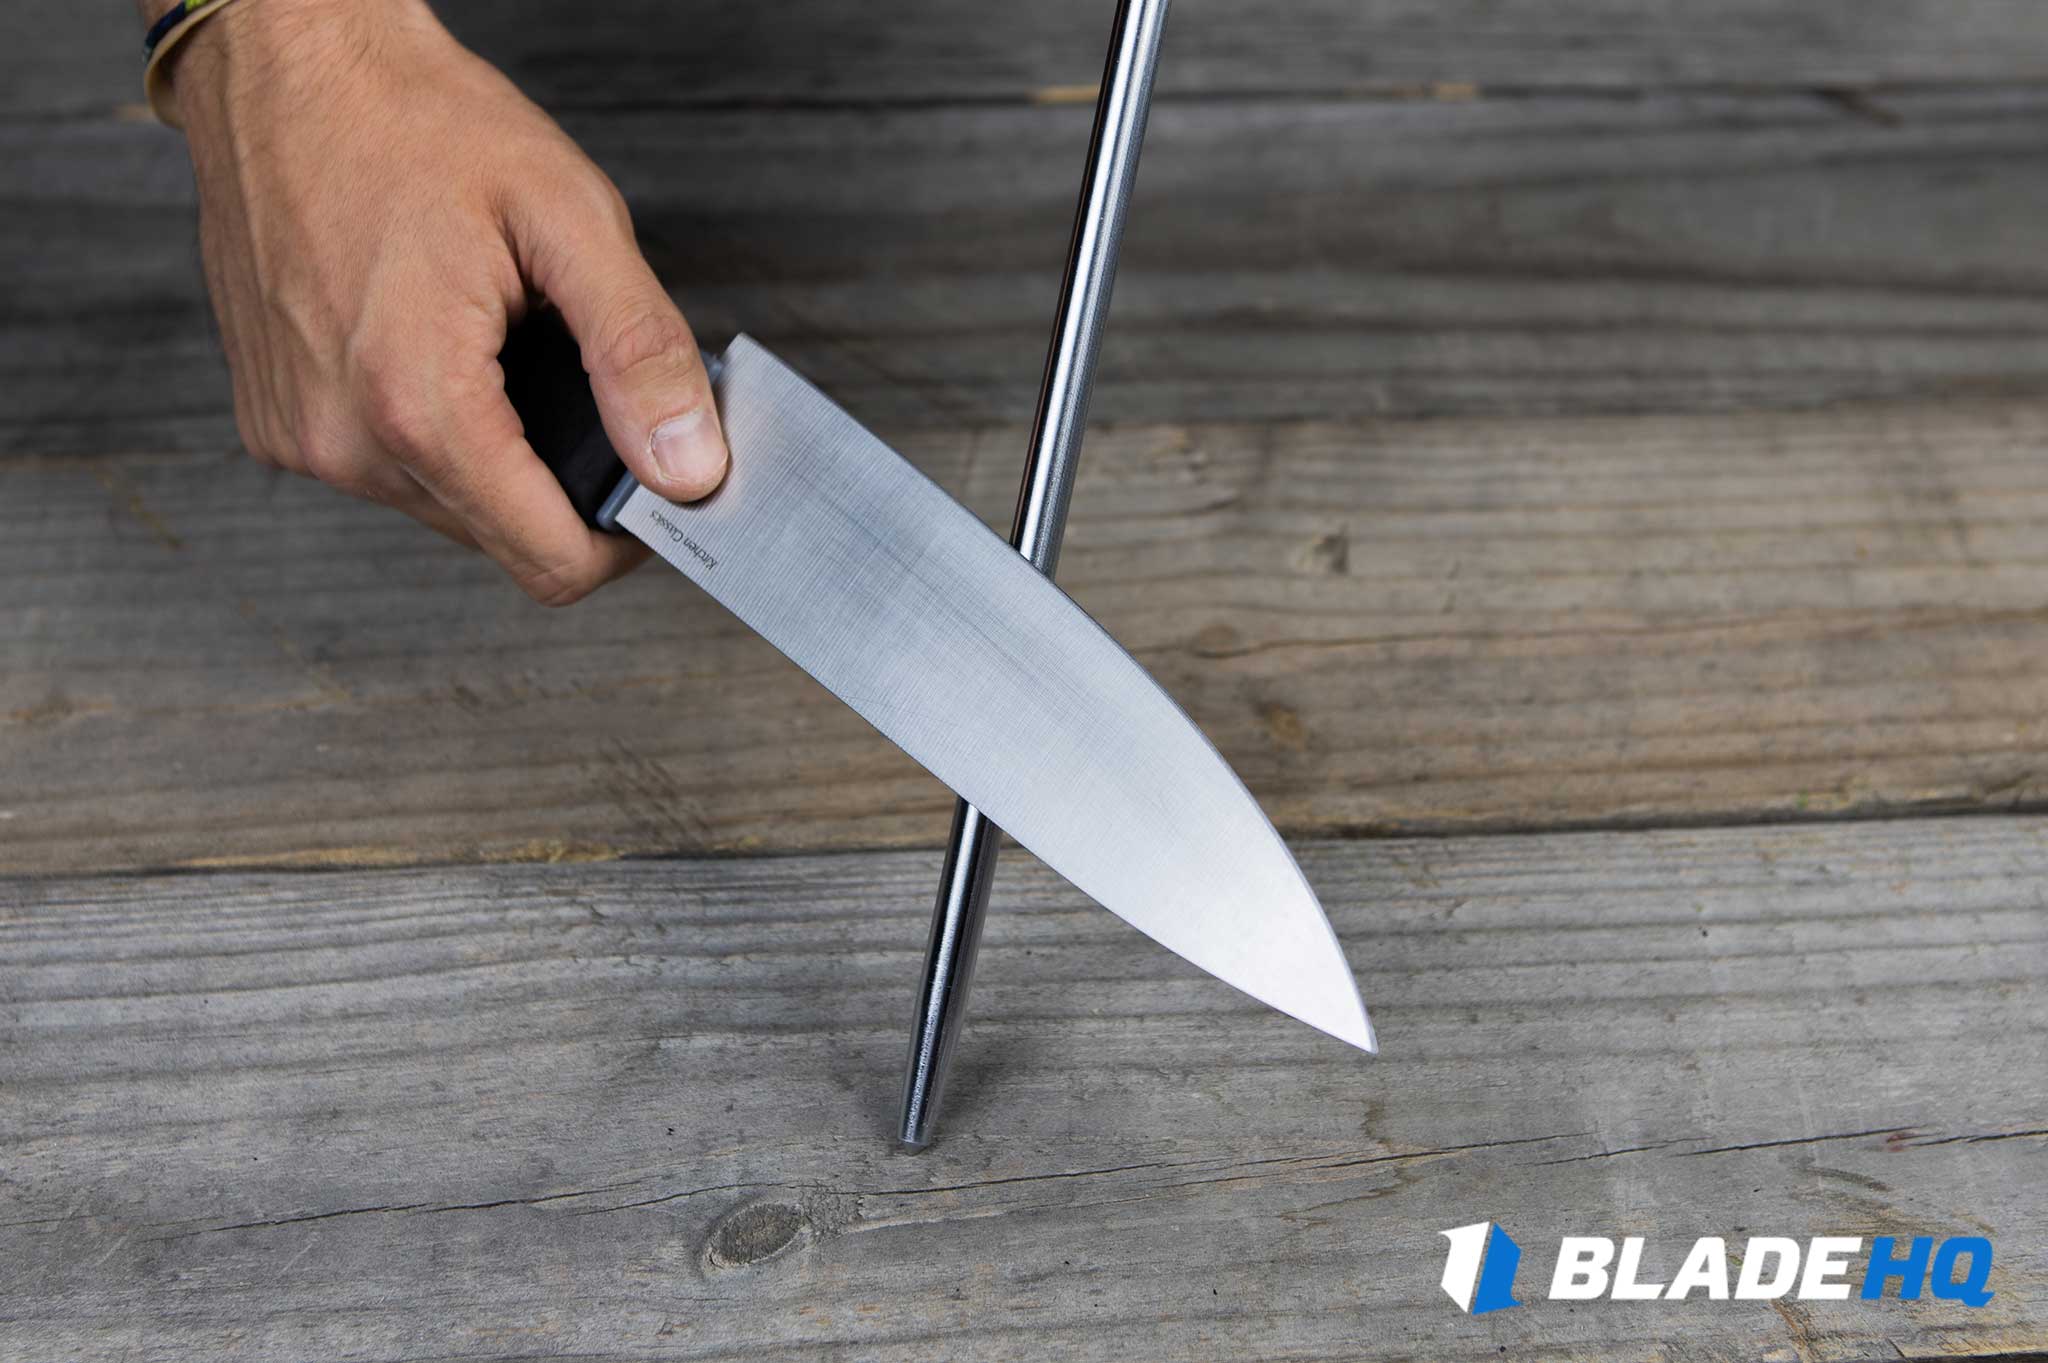
- Gently push your knife along the honing steel while maintaining the same angle you started with making sure to hone the entire edge.
- Alternate passes on both sides making sure to maintain consistent pressure and edge angle.
- Check your work and make sure your knife cuts smoothly before using it for large prep jobs, and strop your knife if you would like to.
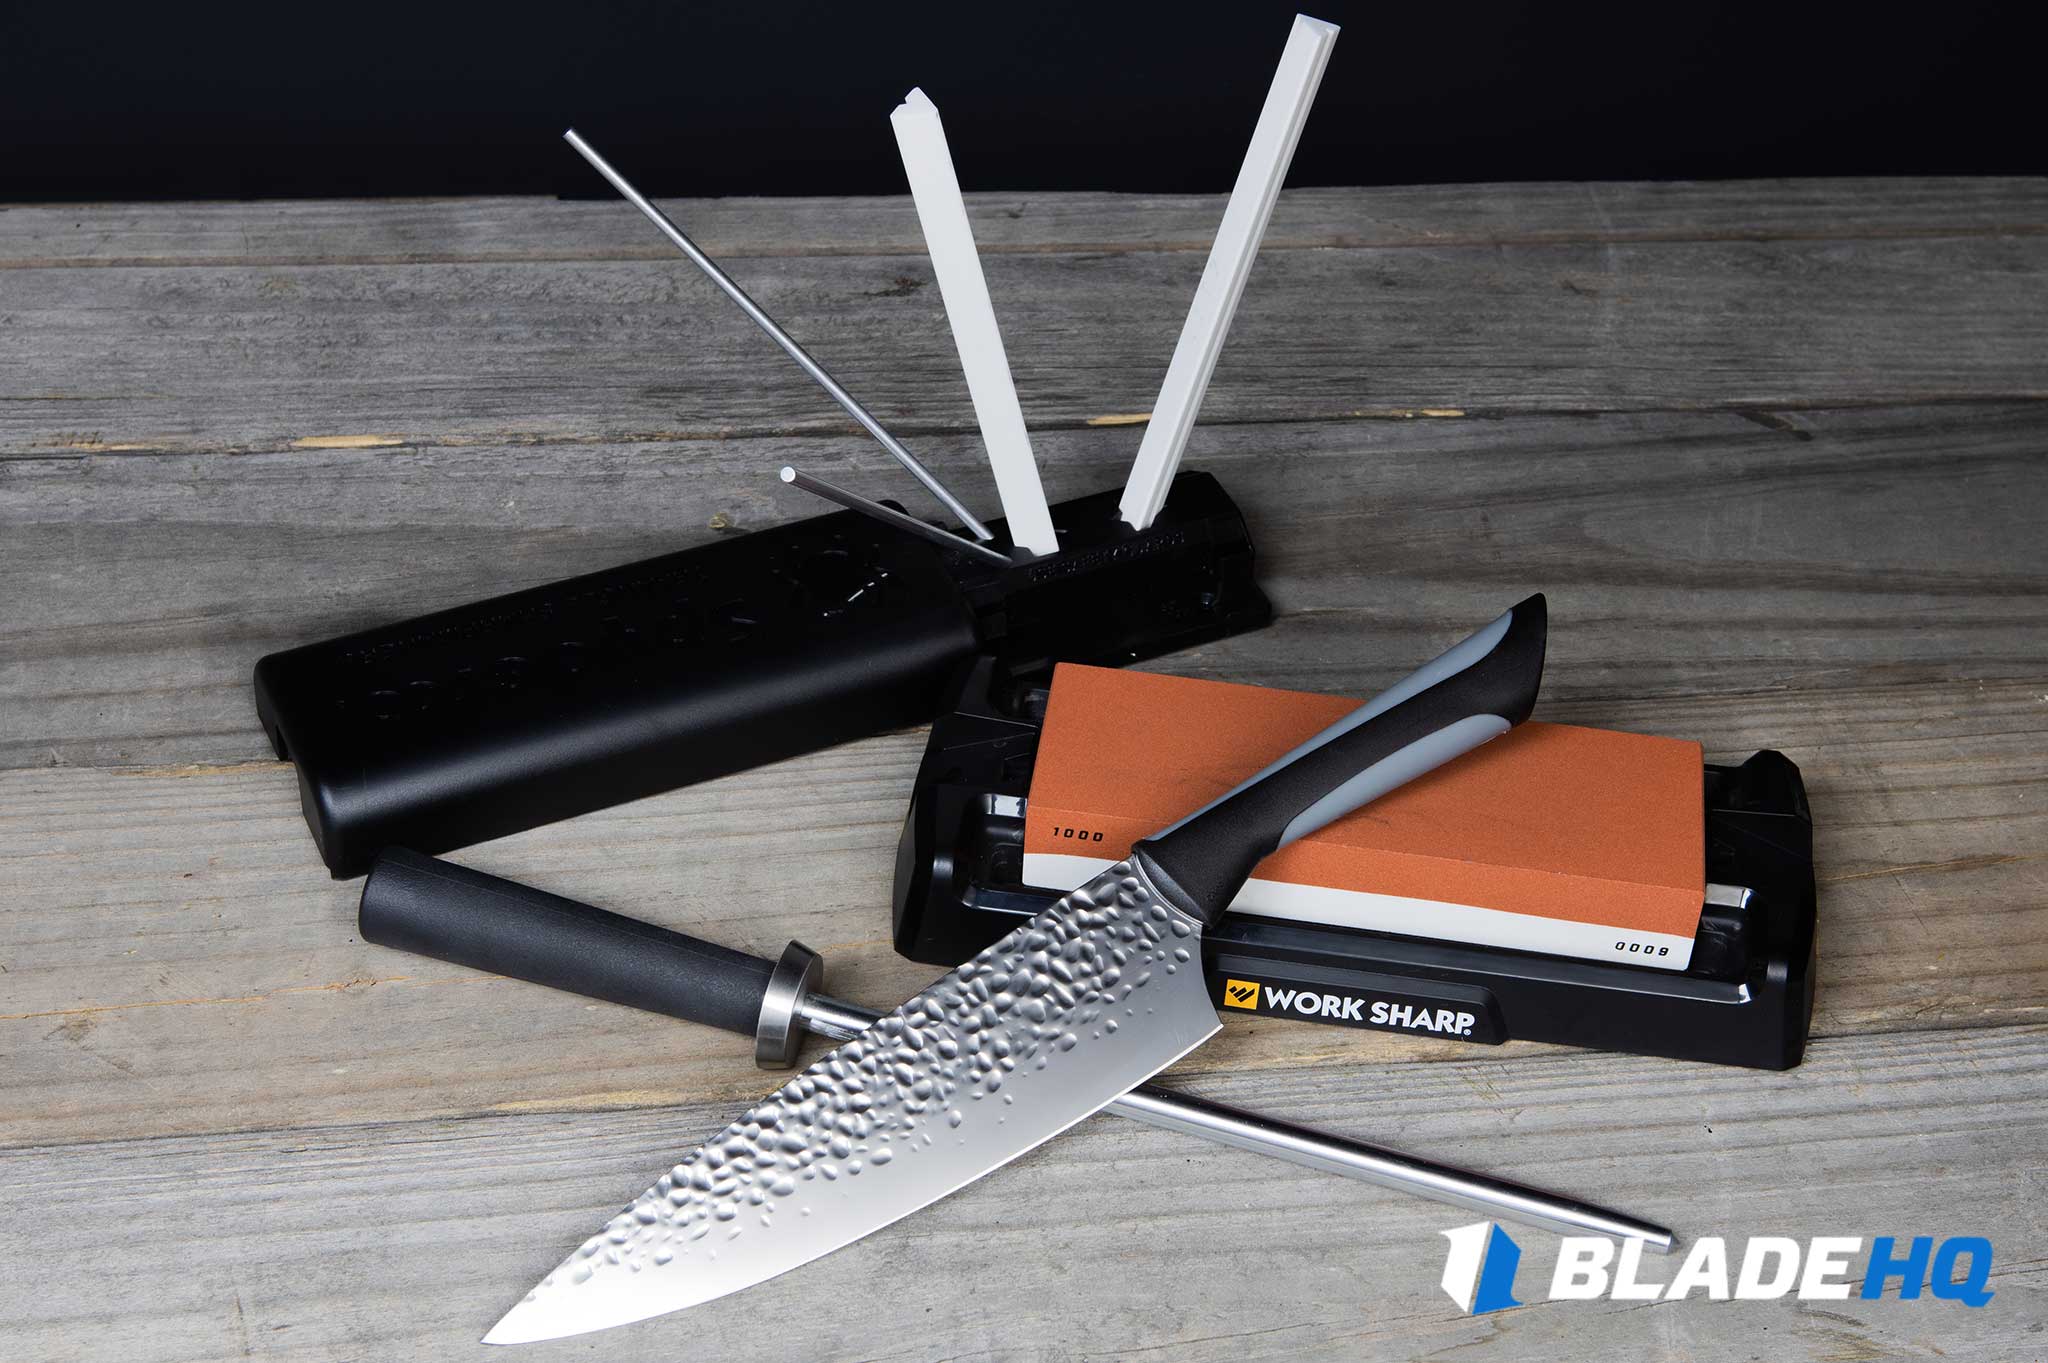
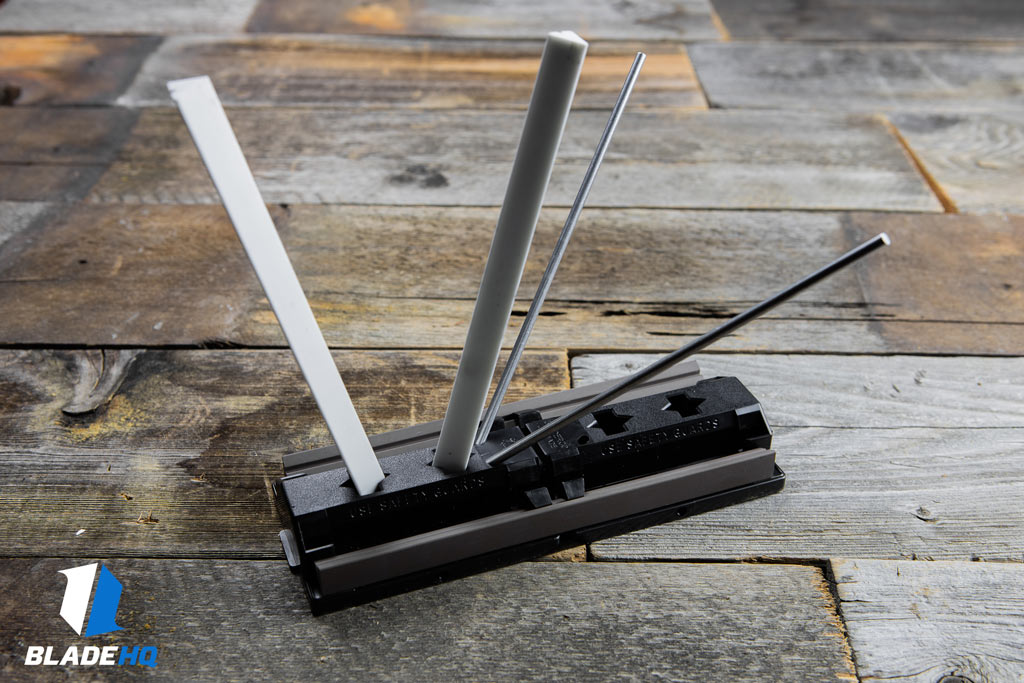
Method 2: Sharpening System
Like anything, there is always a better way to do something. Putting a wicked sharp edge on your kitchen knives improve the performance of each knife and make the process of prepping food and ingredients much safer.
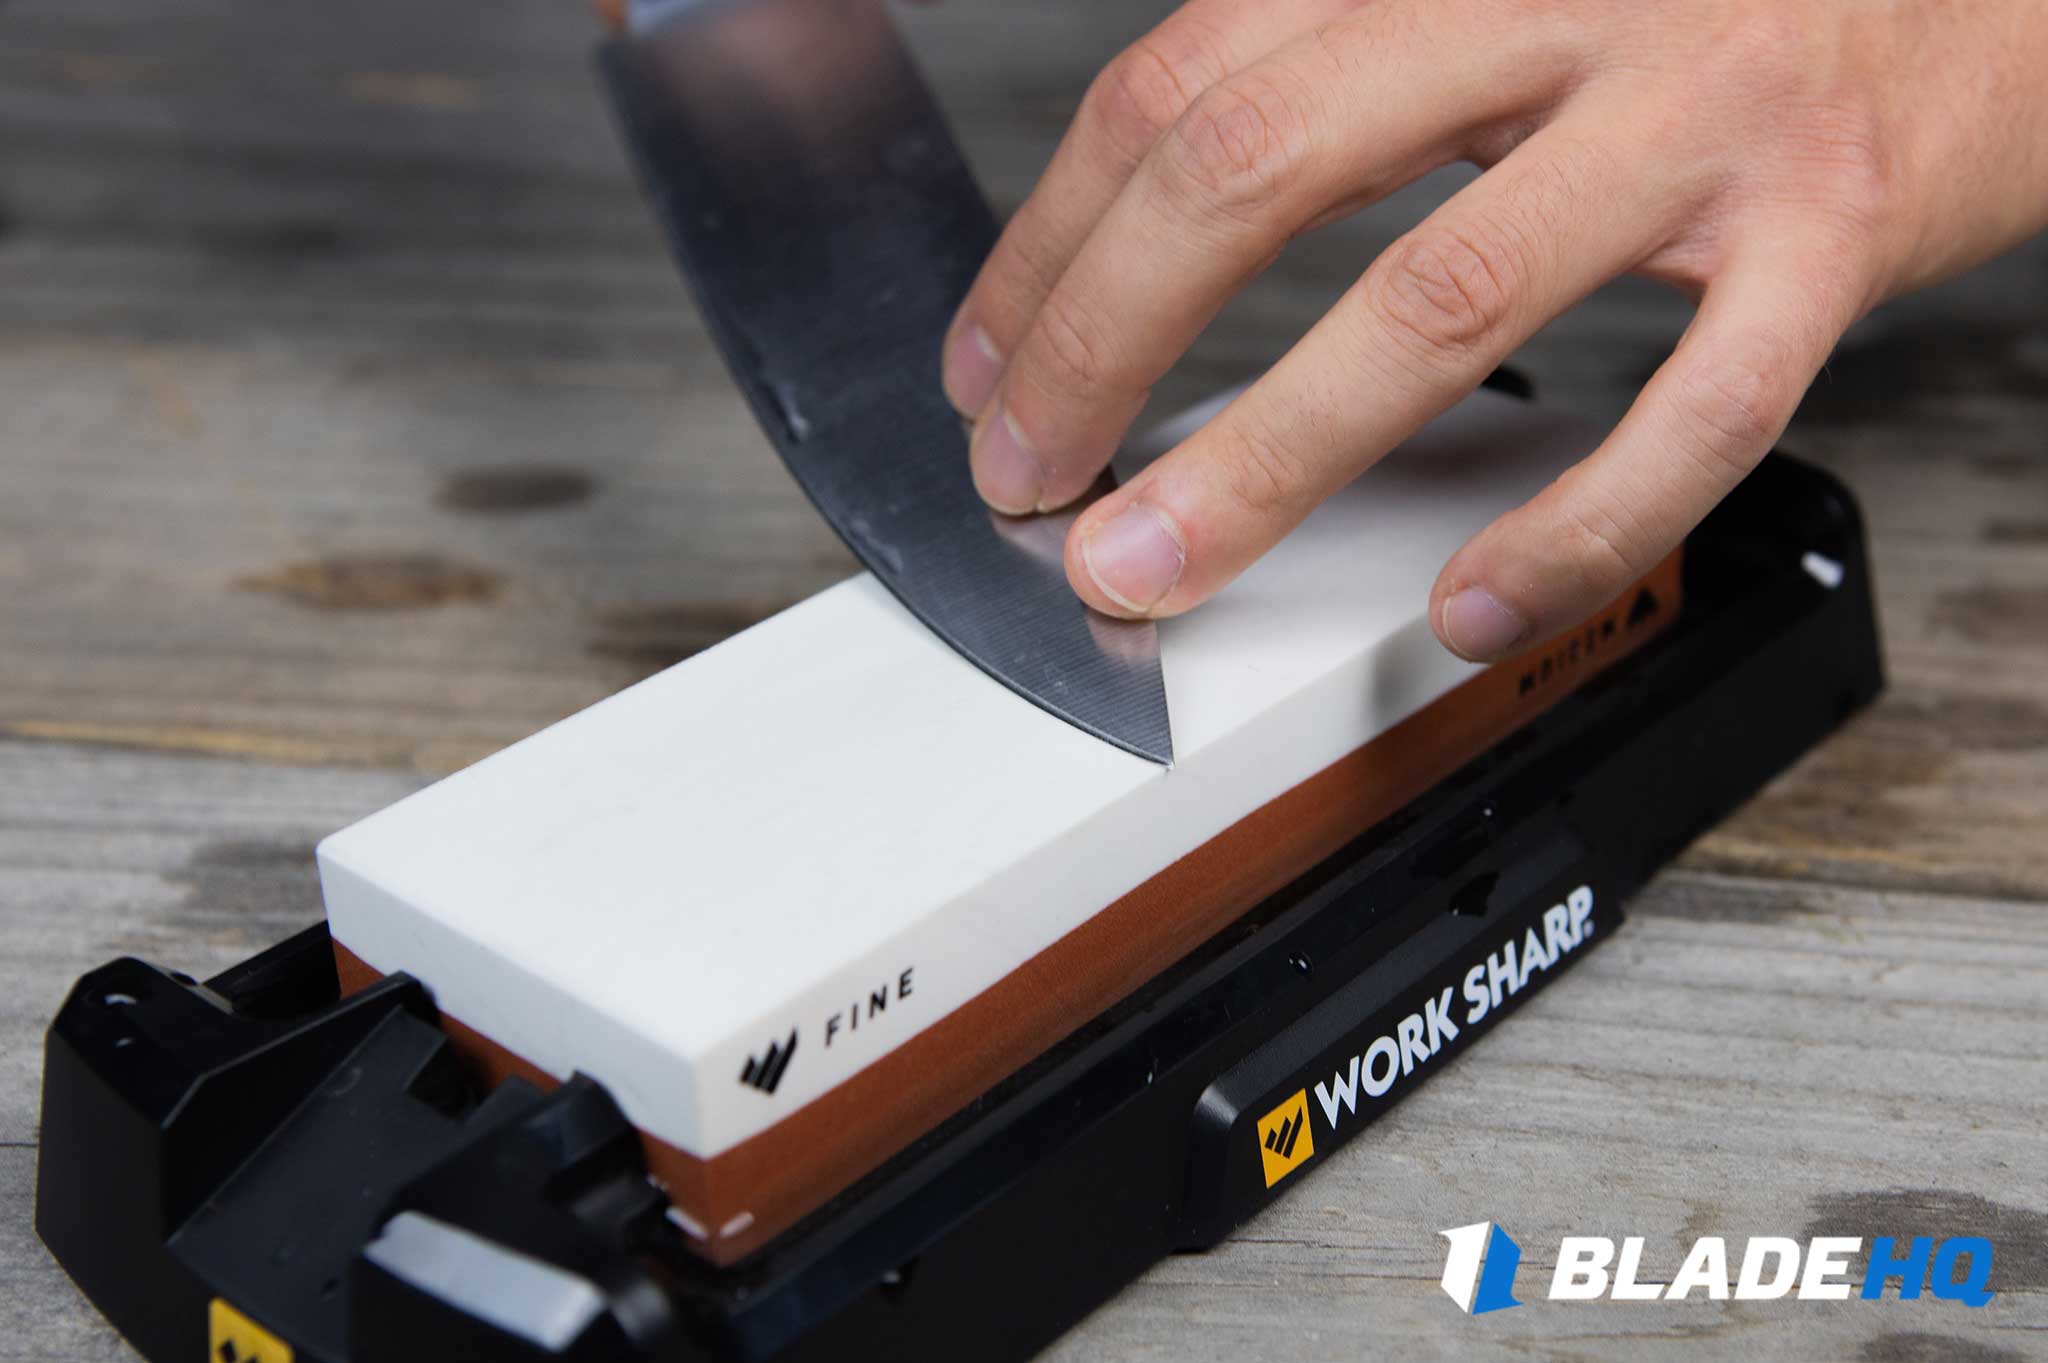
The next method of sharpening a kitchen knife requires the use of a more advanced sharpening system than what’s found with pull-thru sharpeners. Sharpening systems like the Spyderco Sharpmaker or Worksharp Benchtop include better quality sharpening stones and are easily adjusted to match the angle of different knives. Most sharpening systems like these give the user the flexibility to sharpen knives to the angle they were made with. These systems also allow the user to set the stones flat for freehand sharpening.
Steps:
- Examine the edge of your knife making note of any damage, and use your bevel gauge to determine your sharpening angle.
- Place your sharpening system on a solid, flat surface (like your kitchen countertop) and setup the sharpening stones at the edge angle you determined.
- Firmly hold the sharpening system with your non-dominant hand making sure to use safety guards included with your sharpening system.
- With the knife in your non-dominant hand, place the heel/butt of the blade near the top of one of the sharpening stones making sure to hold the knife perpendicular to the floor or countertop.
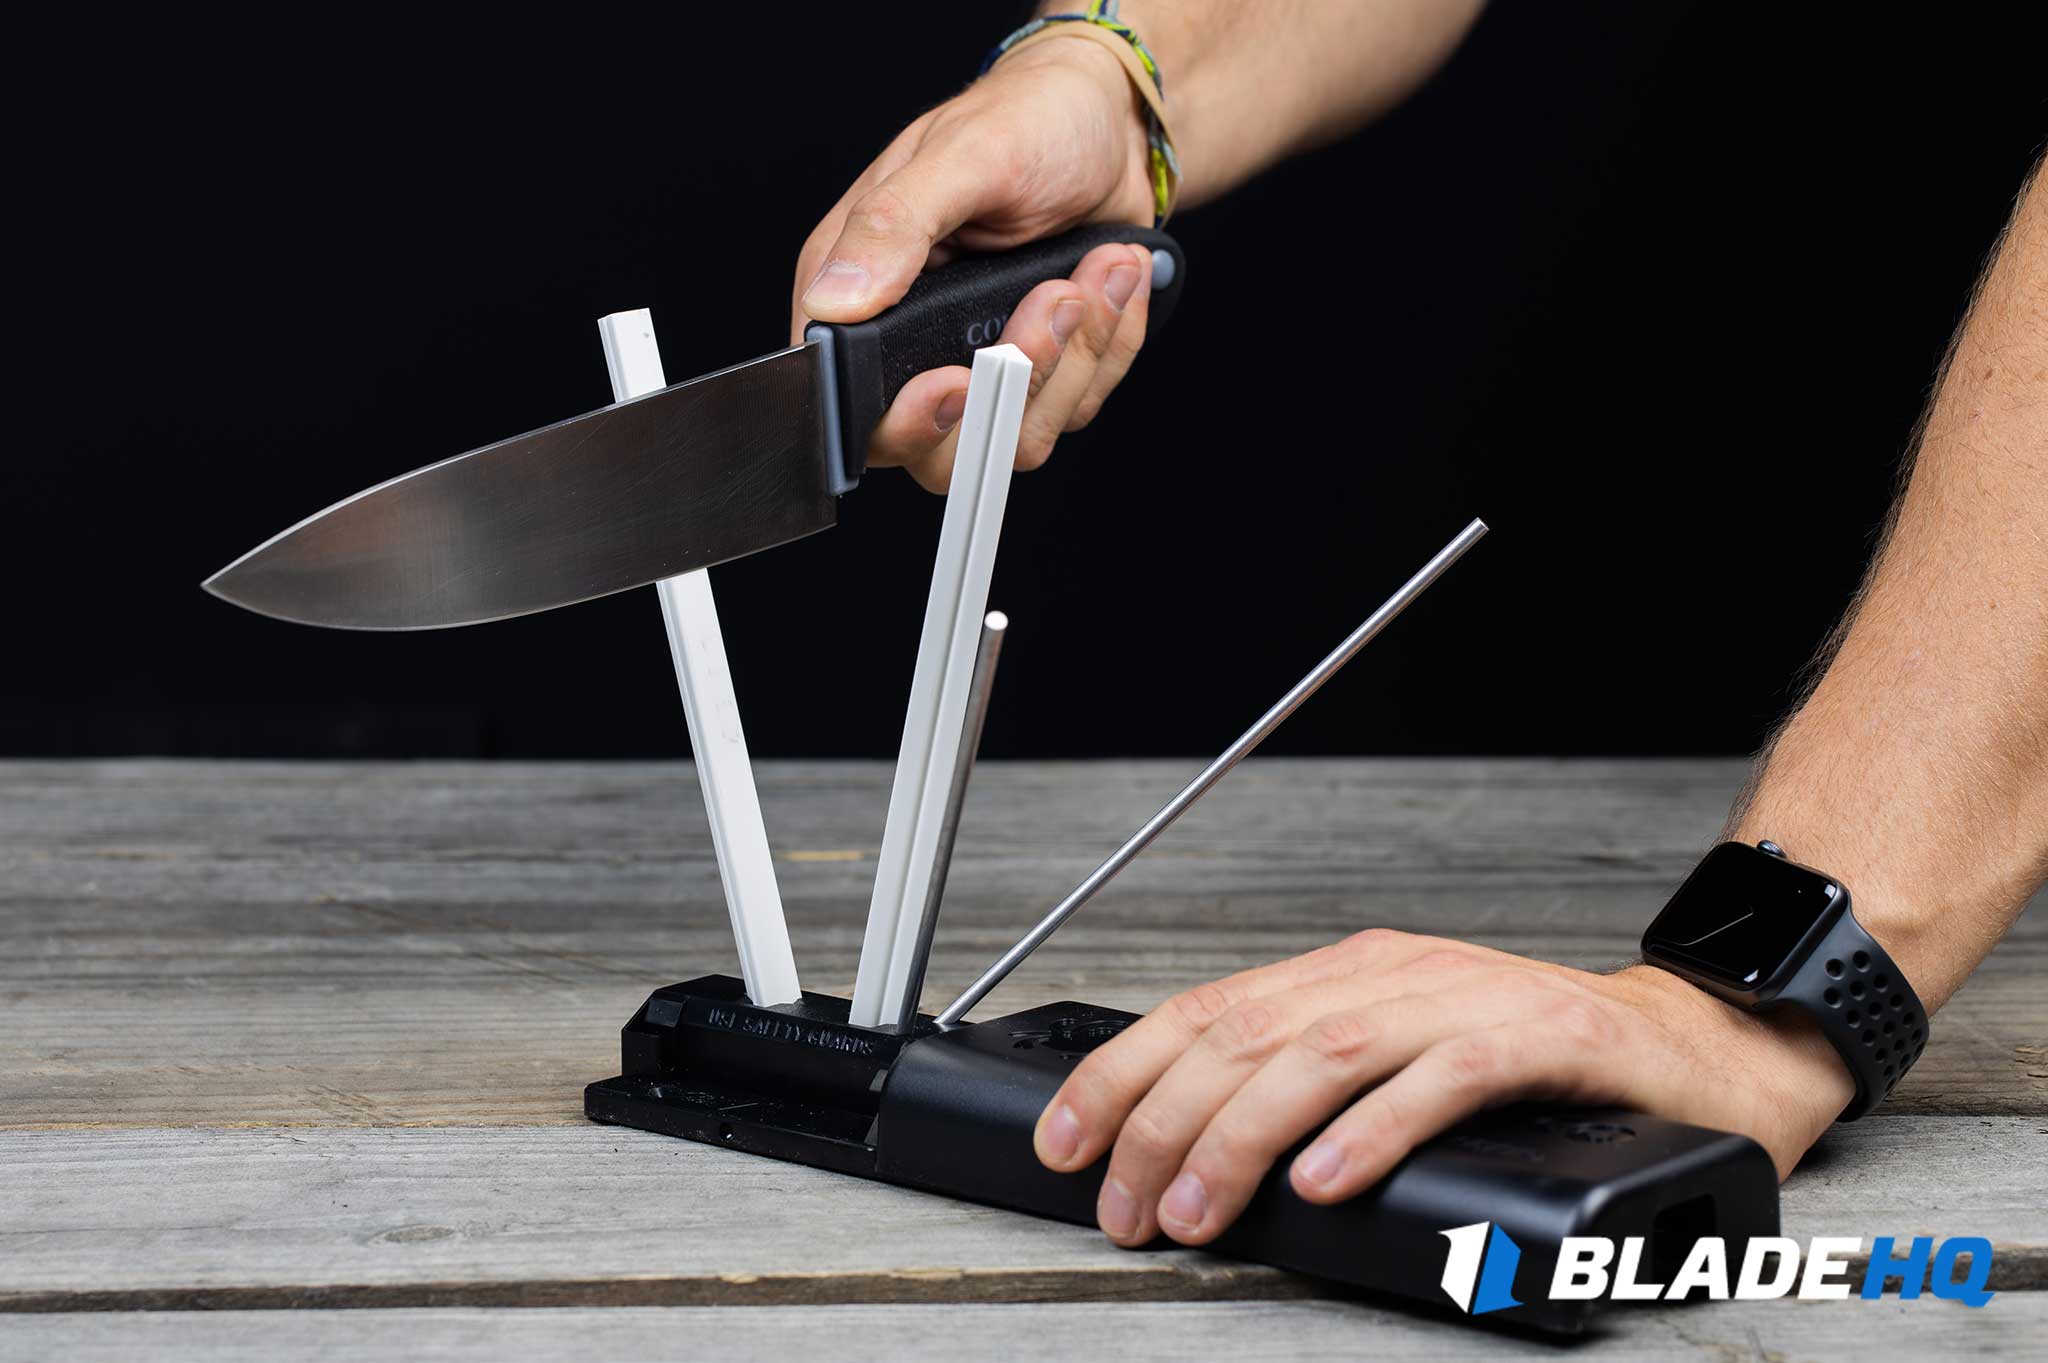
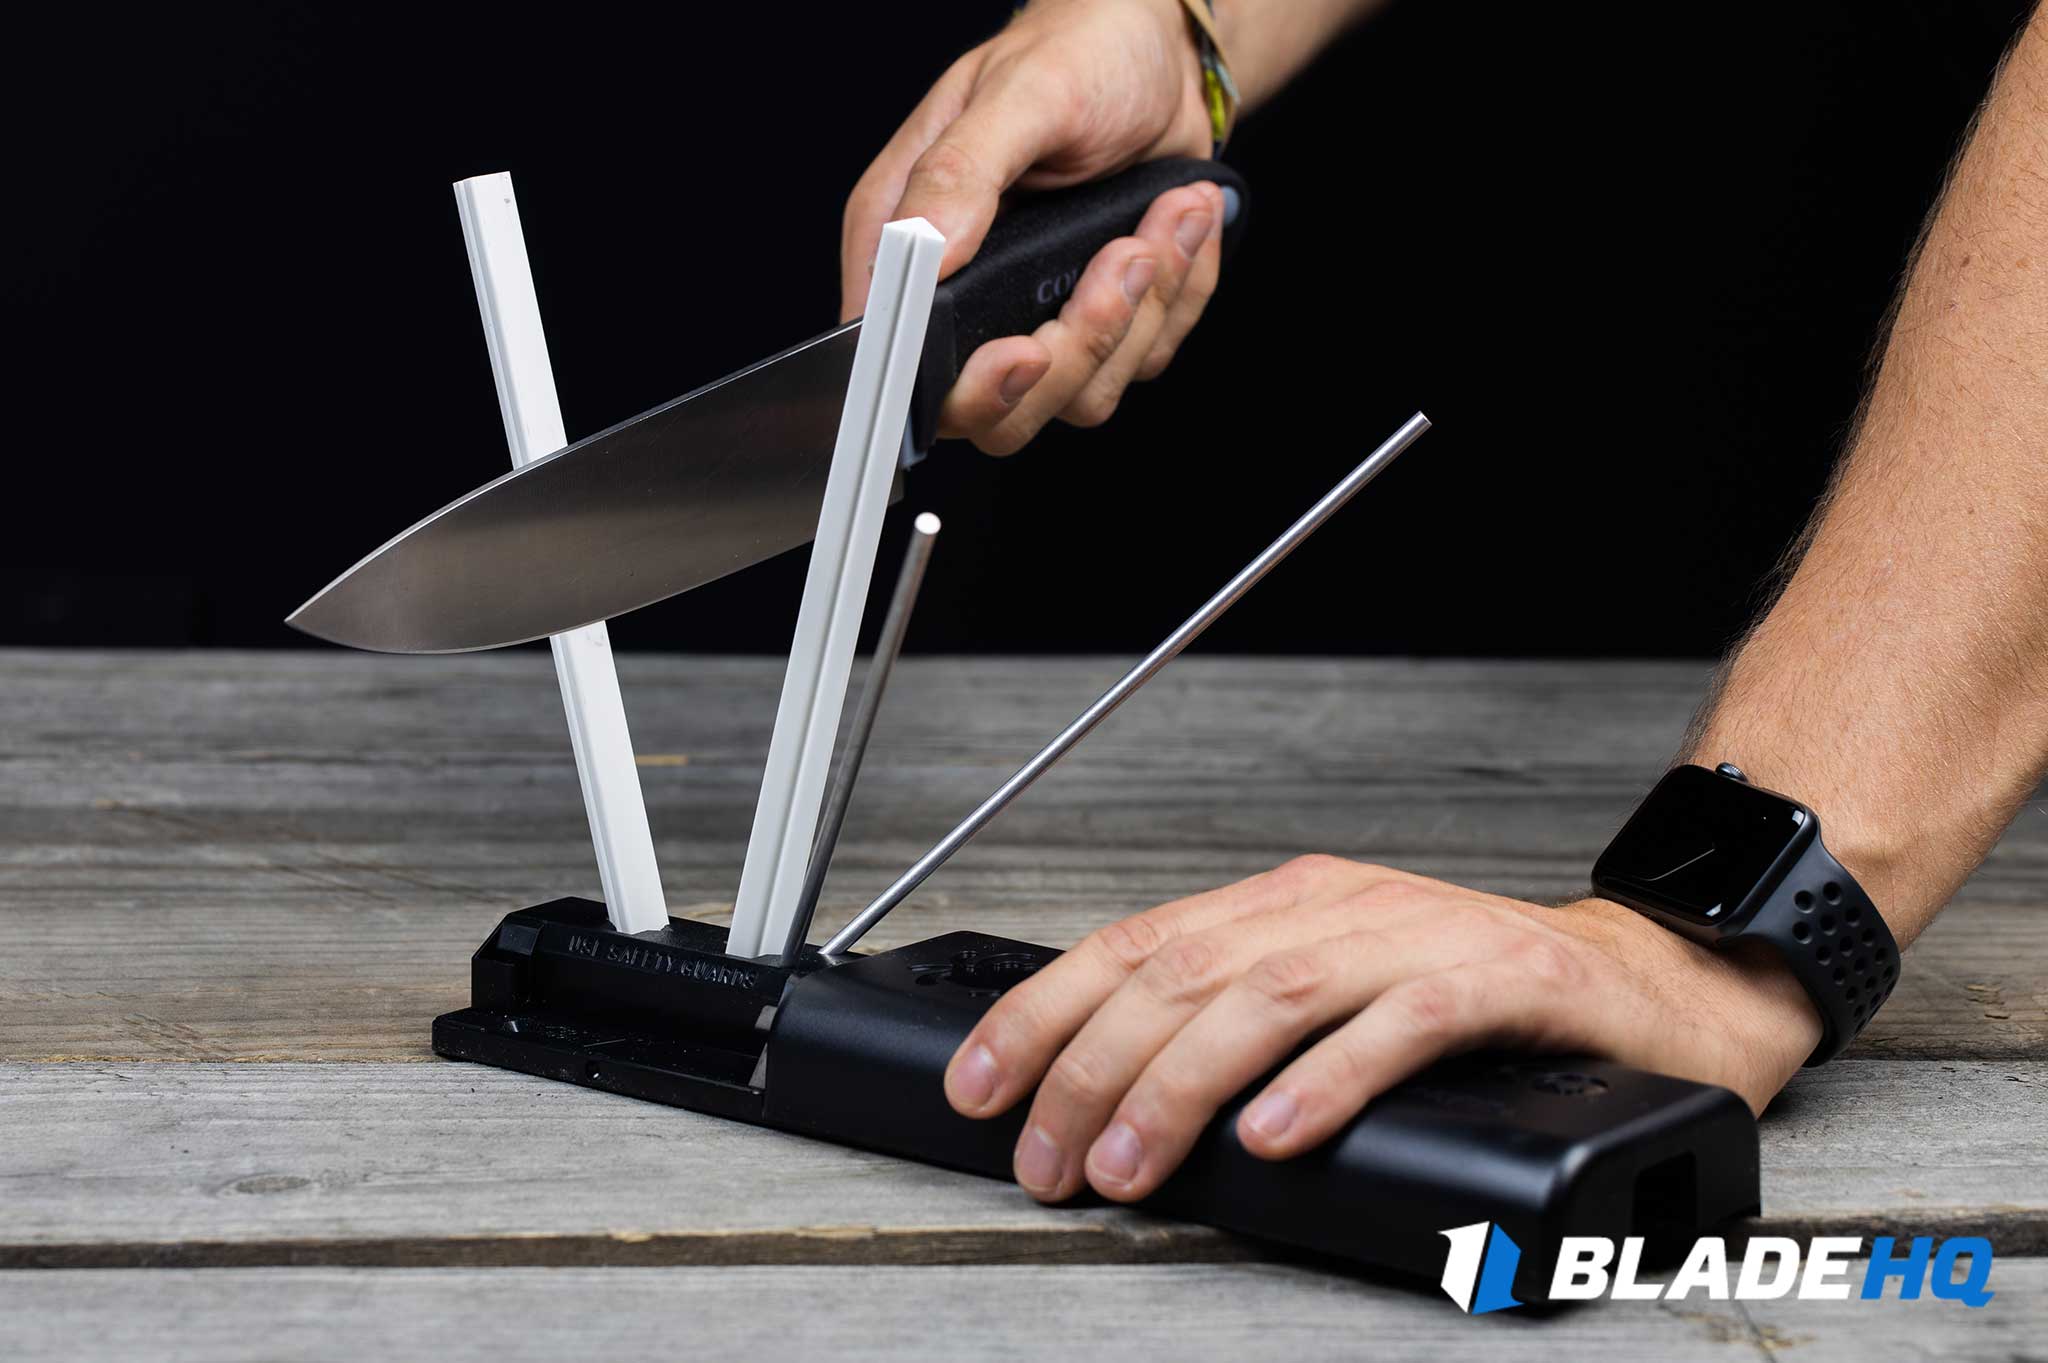
- Using light, consistent pressure, glide the knife along the sharpening stone from heel to tip, then switch to the opposite sharpening stone and repeat this step for the opposite edge.
- Make several passes on each side of the knife then check for edge consistency and any remaining imperfections. If there is still visible damage, repeat this process until it is no longer visible.
- Progressively sharpen your knife with finer grit sharpening stones until there is no visible damage and the edge is smooth and consistent.
- When your knife is sharpened to your liking, use a leather strop to remove burrs and fine imperfections.
For more information on the Spyderco Sharpmaker, check out our review by clicking here!
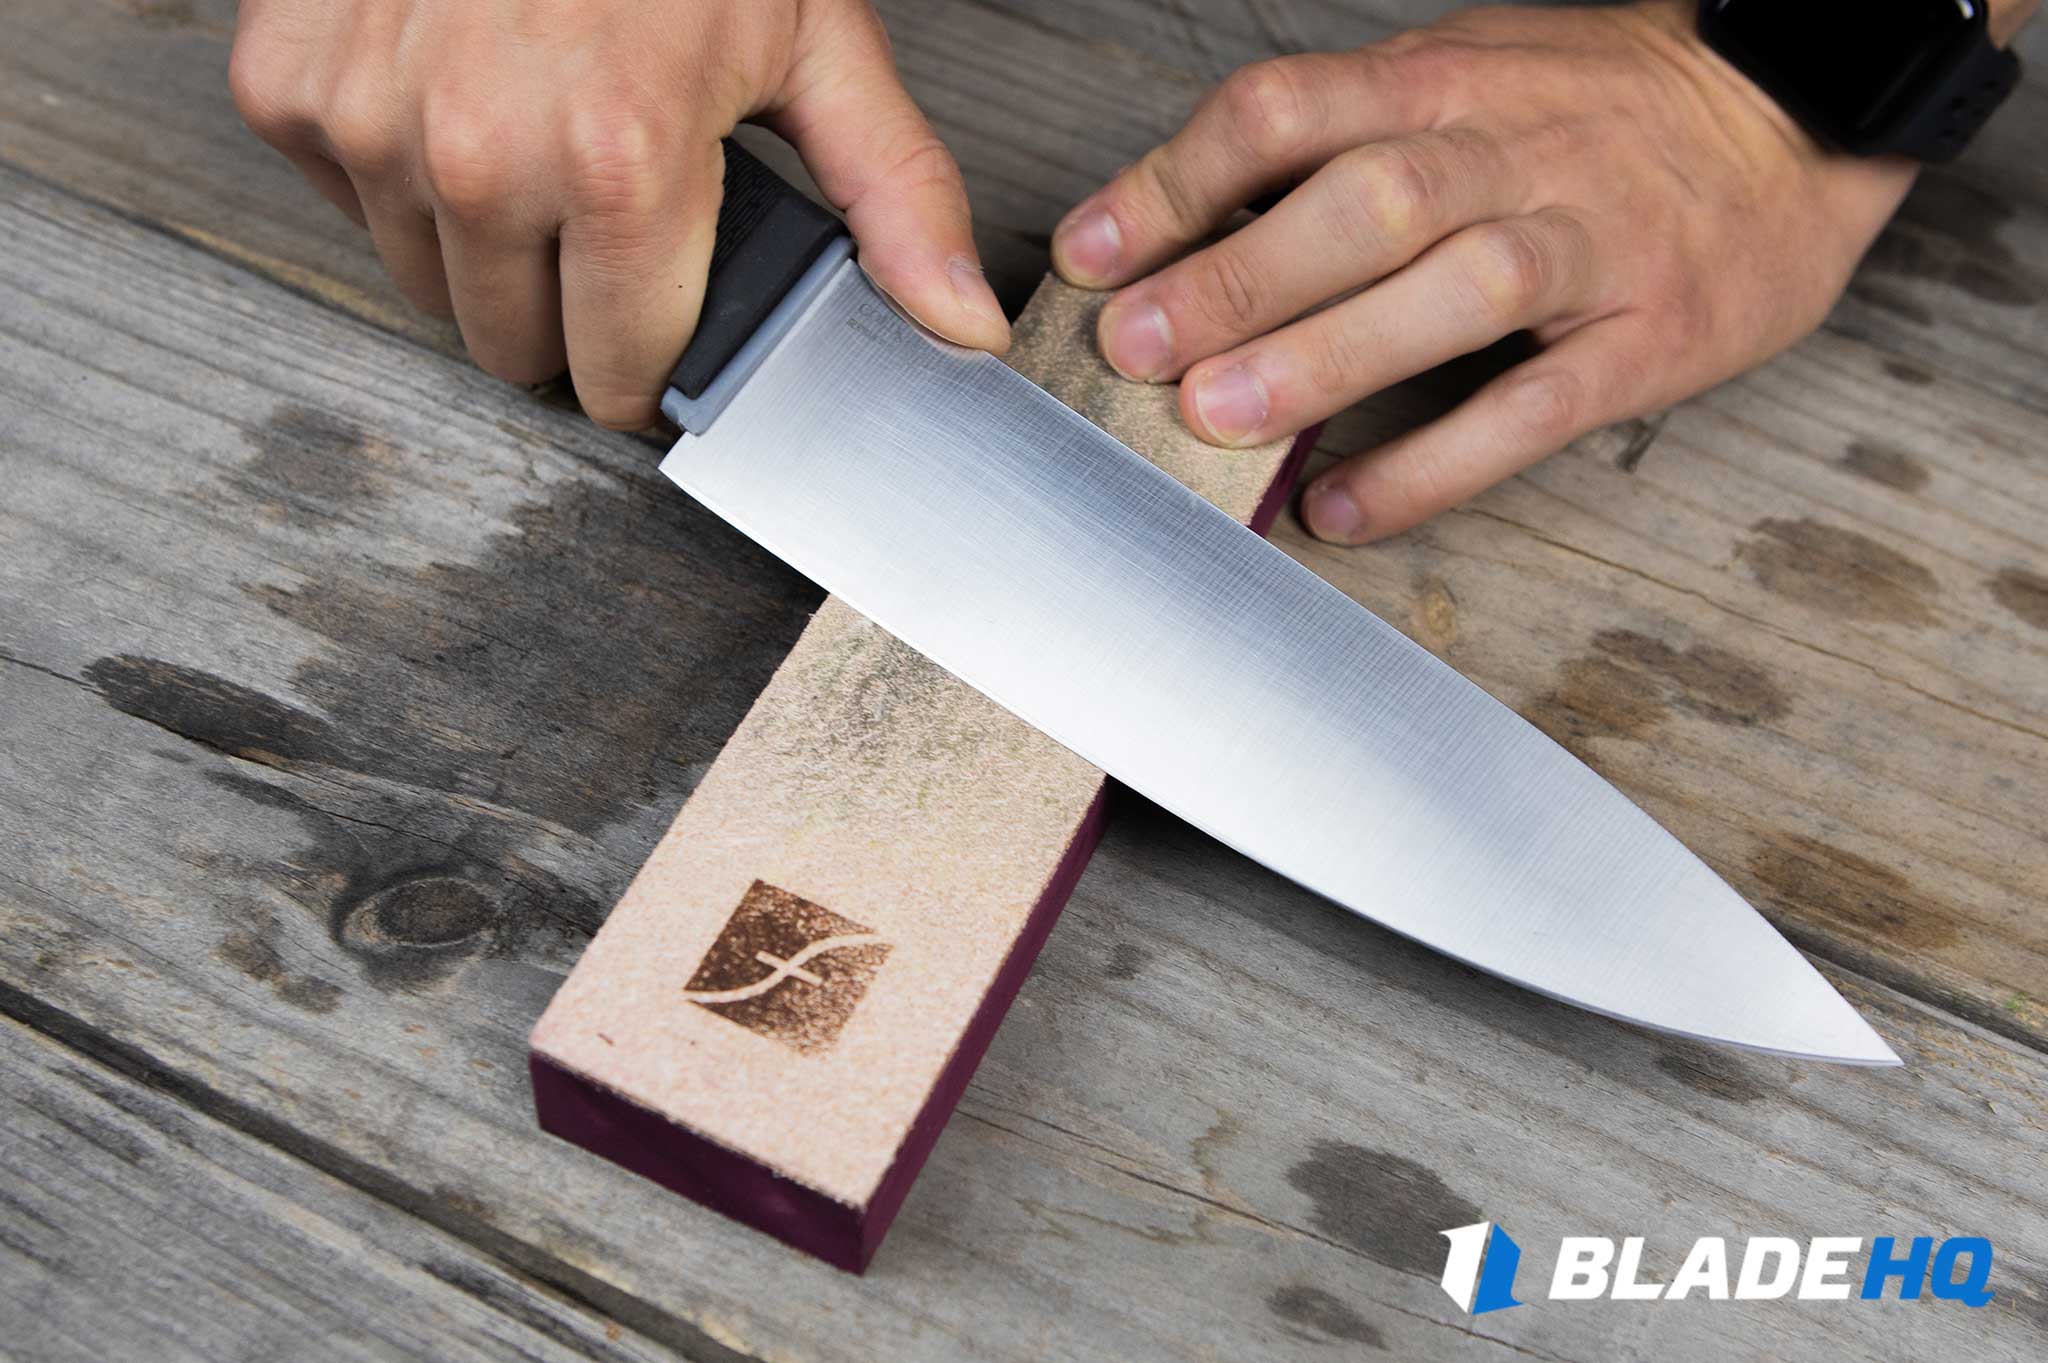
Method 3: Whetstone

Though most of you will probably never use this method to sharpen your kitchen knives, whetstone sharpening has been the sharpening method of choice for professional chefs since the dawn of time. It’s a simple yet complicated way to sharpen a knife, and when done right, will put a sharper edge on a knife than any other method.
Sharpening a kitchen knife using whetstones can be broken down into four parts: abrasive, angle, pressure, and consistency. The right combination of these parts contributes to thin, consistent edges and leads to better performance over time.
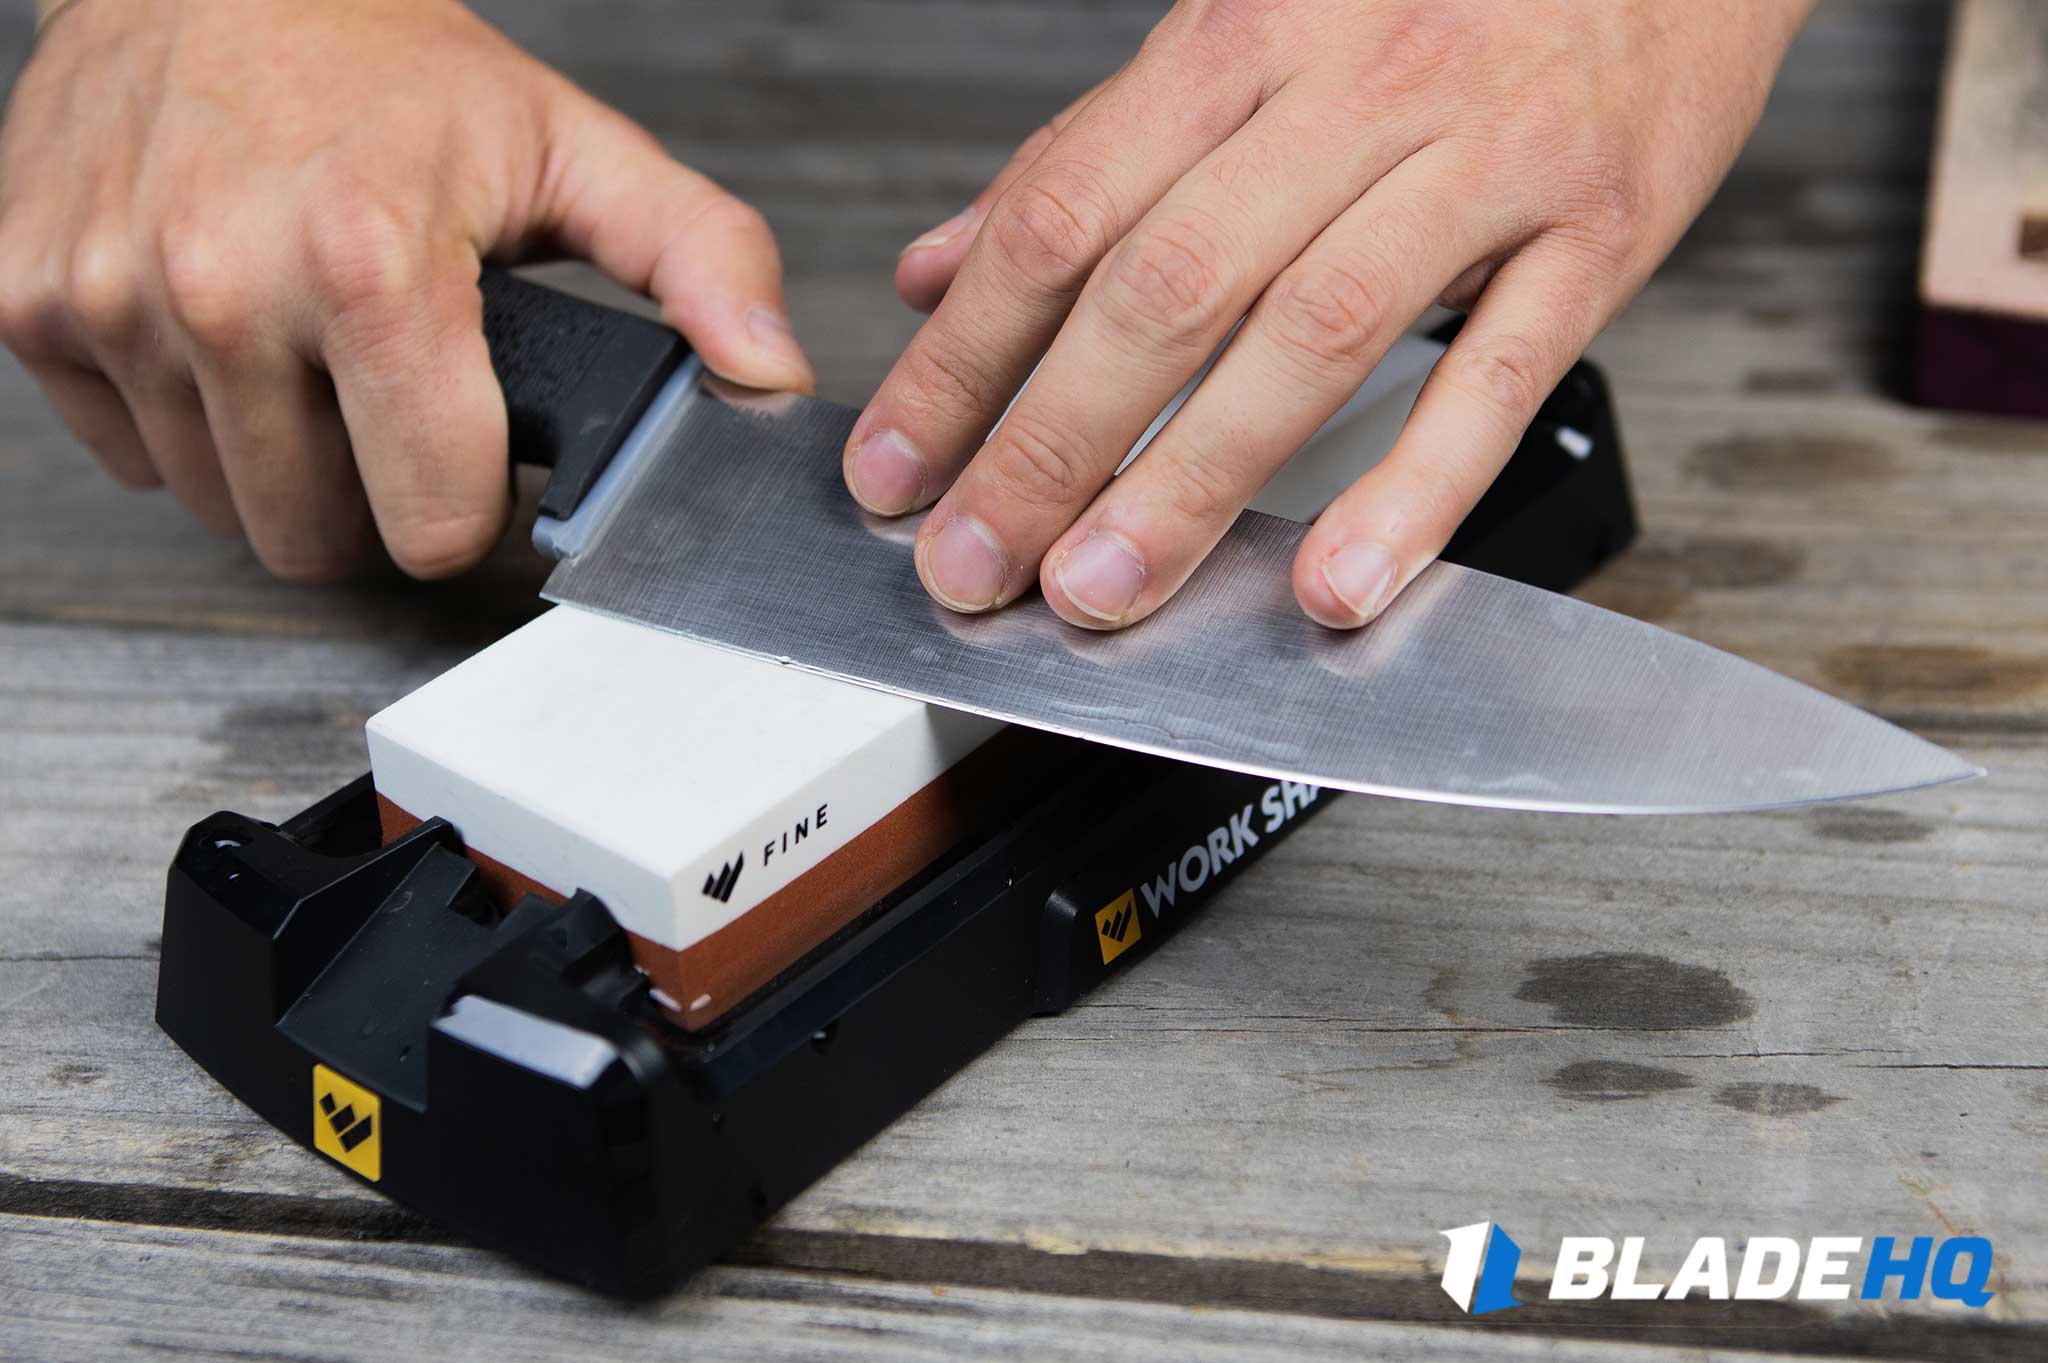
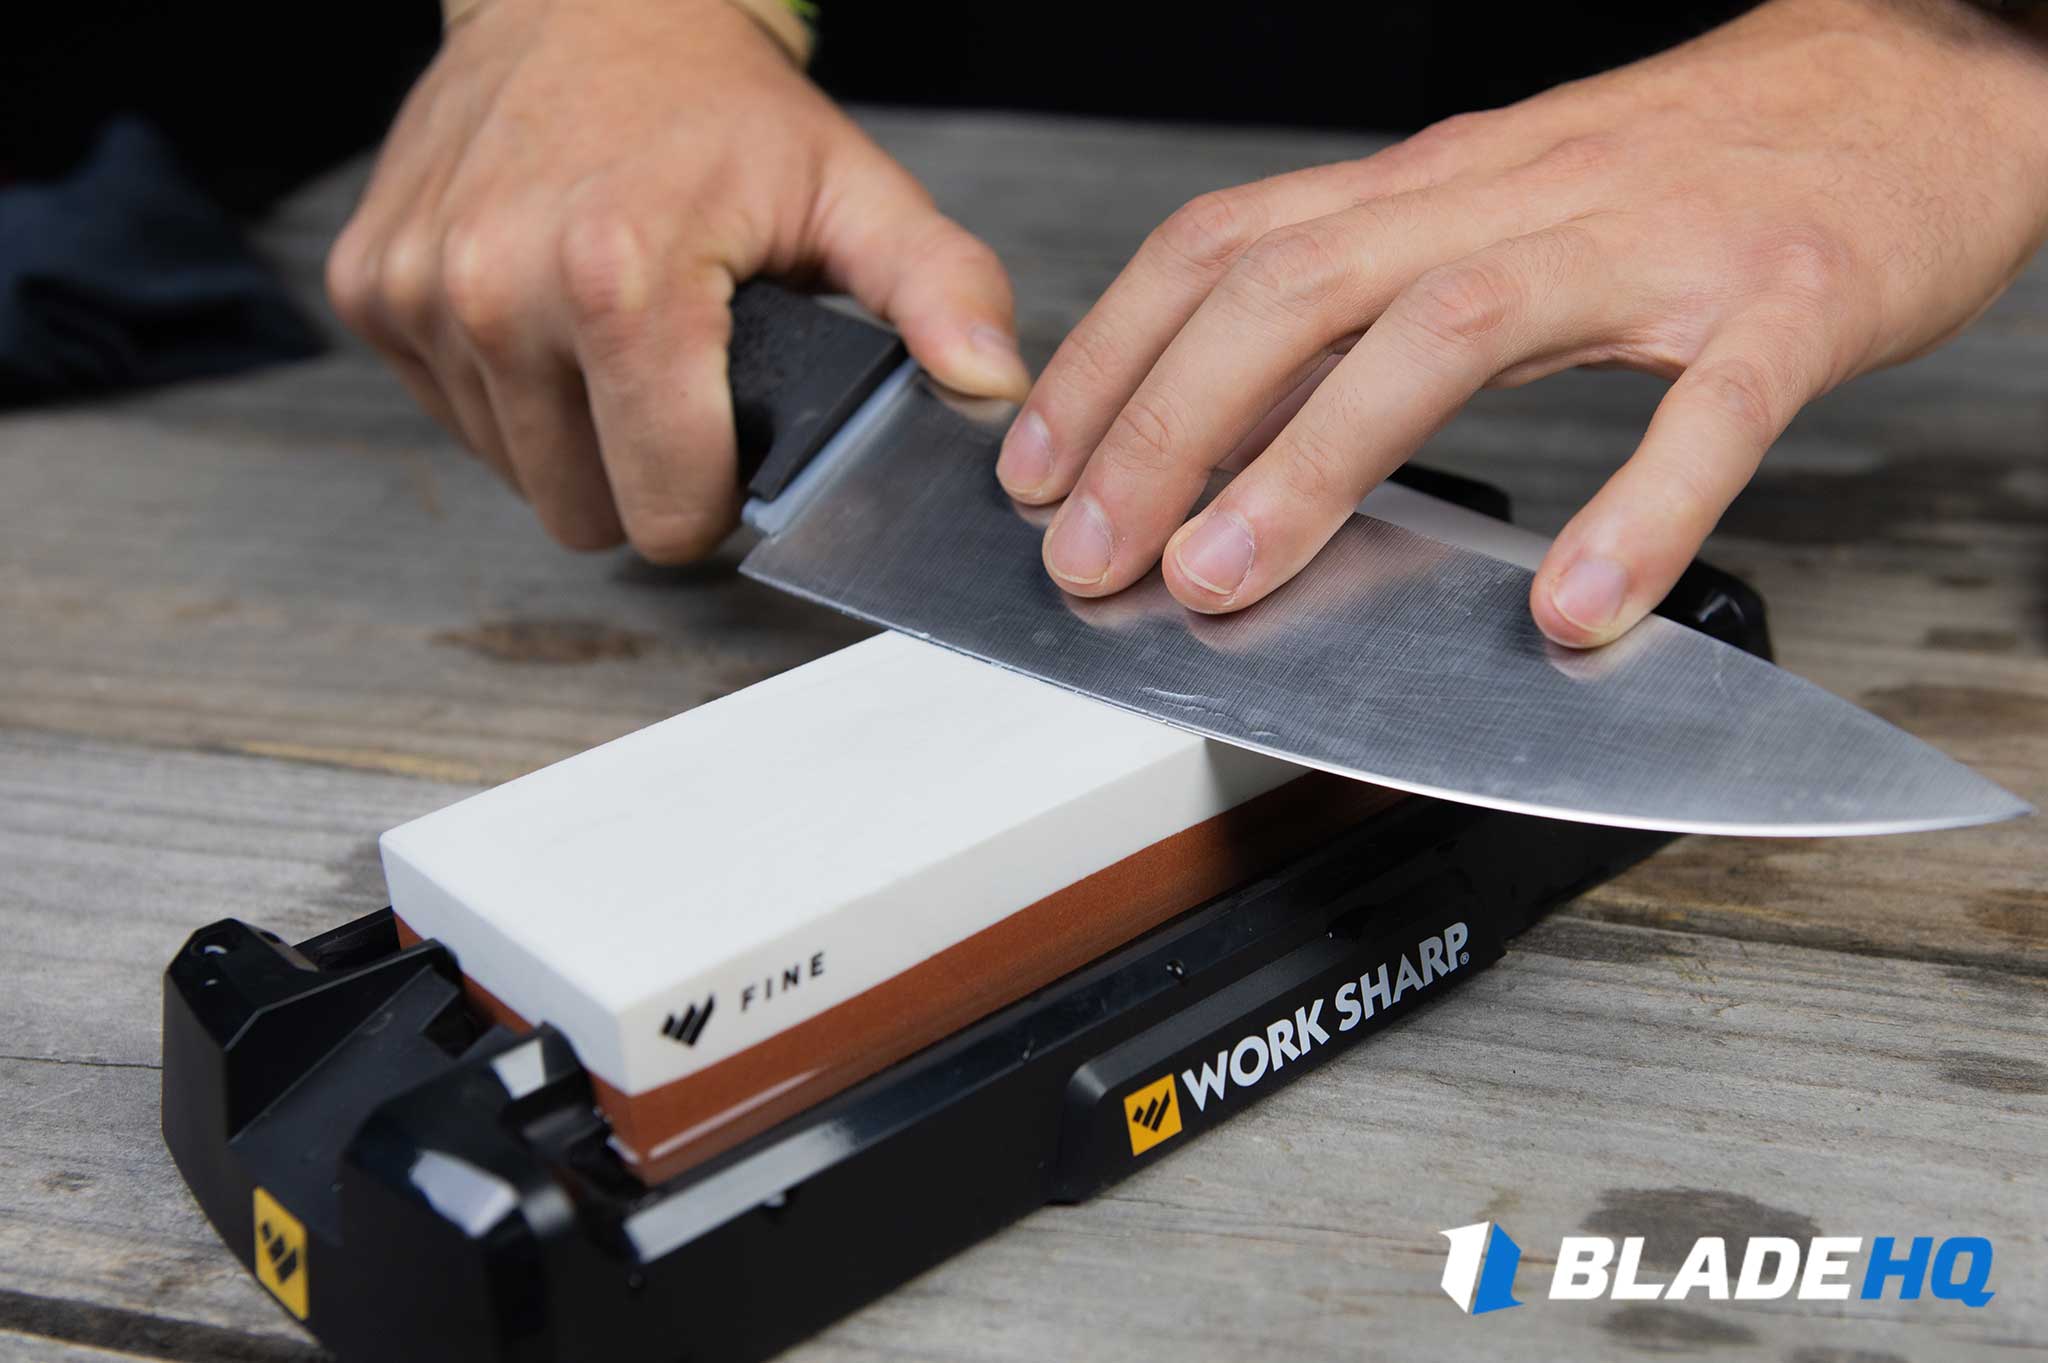
Before starting the sharpening process, it’s important to choose the right whetstone(s) for what you need. If your knives are beat up and damaged, a lower grit stone will help remove more material faster and help bring new life to worn edges. If your knives are in decent shape and in need of a refreshed edge, a medium or fine grit stone will be a better choice. In this tutorial we are using a Darex Work Sharp Whetstone which has a 1000 grit medium-fine side and a 6000 grit finer side. There are many different whetstones, so be sure to find one that suits your needs and works well with the knives you’re sharpening.
Steps:
- If using a wet whetstone, place it in a tub of water to soak for about 15 minutes. (Be sure to check your manufacturer’s recommendations for what your stones require, some stones are meant to be used dry while others are designed to be used with oil or water.)
- Place your whetstone and base on a solid, flat surface (like your kitchen countertop) and setup the sharpening stones at the edge angle you determined.
- Examine the edge of your knife making note of any damage, and use your bevel gauge to determine your sharpening angle.
- Holding the knife in your dominant hand with the edge facing away from you, place the heel/butt of the blade at the edge of the whetstone with enough room to draw the full length of the edge to you.
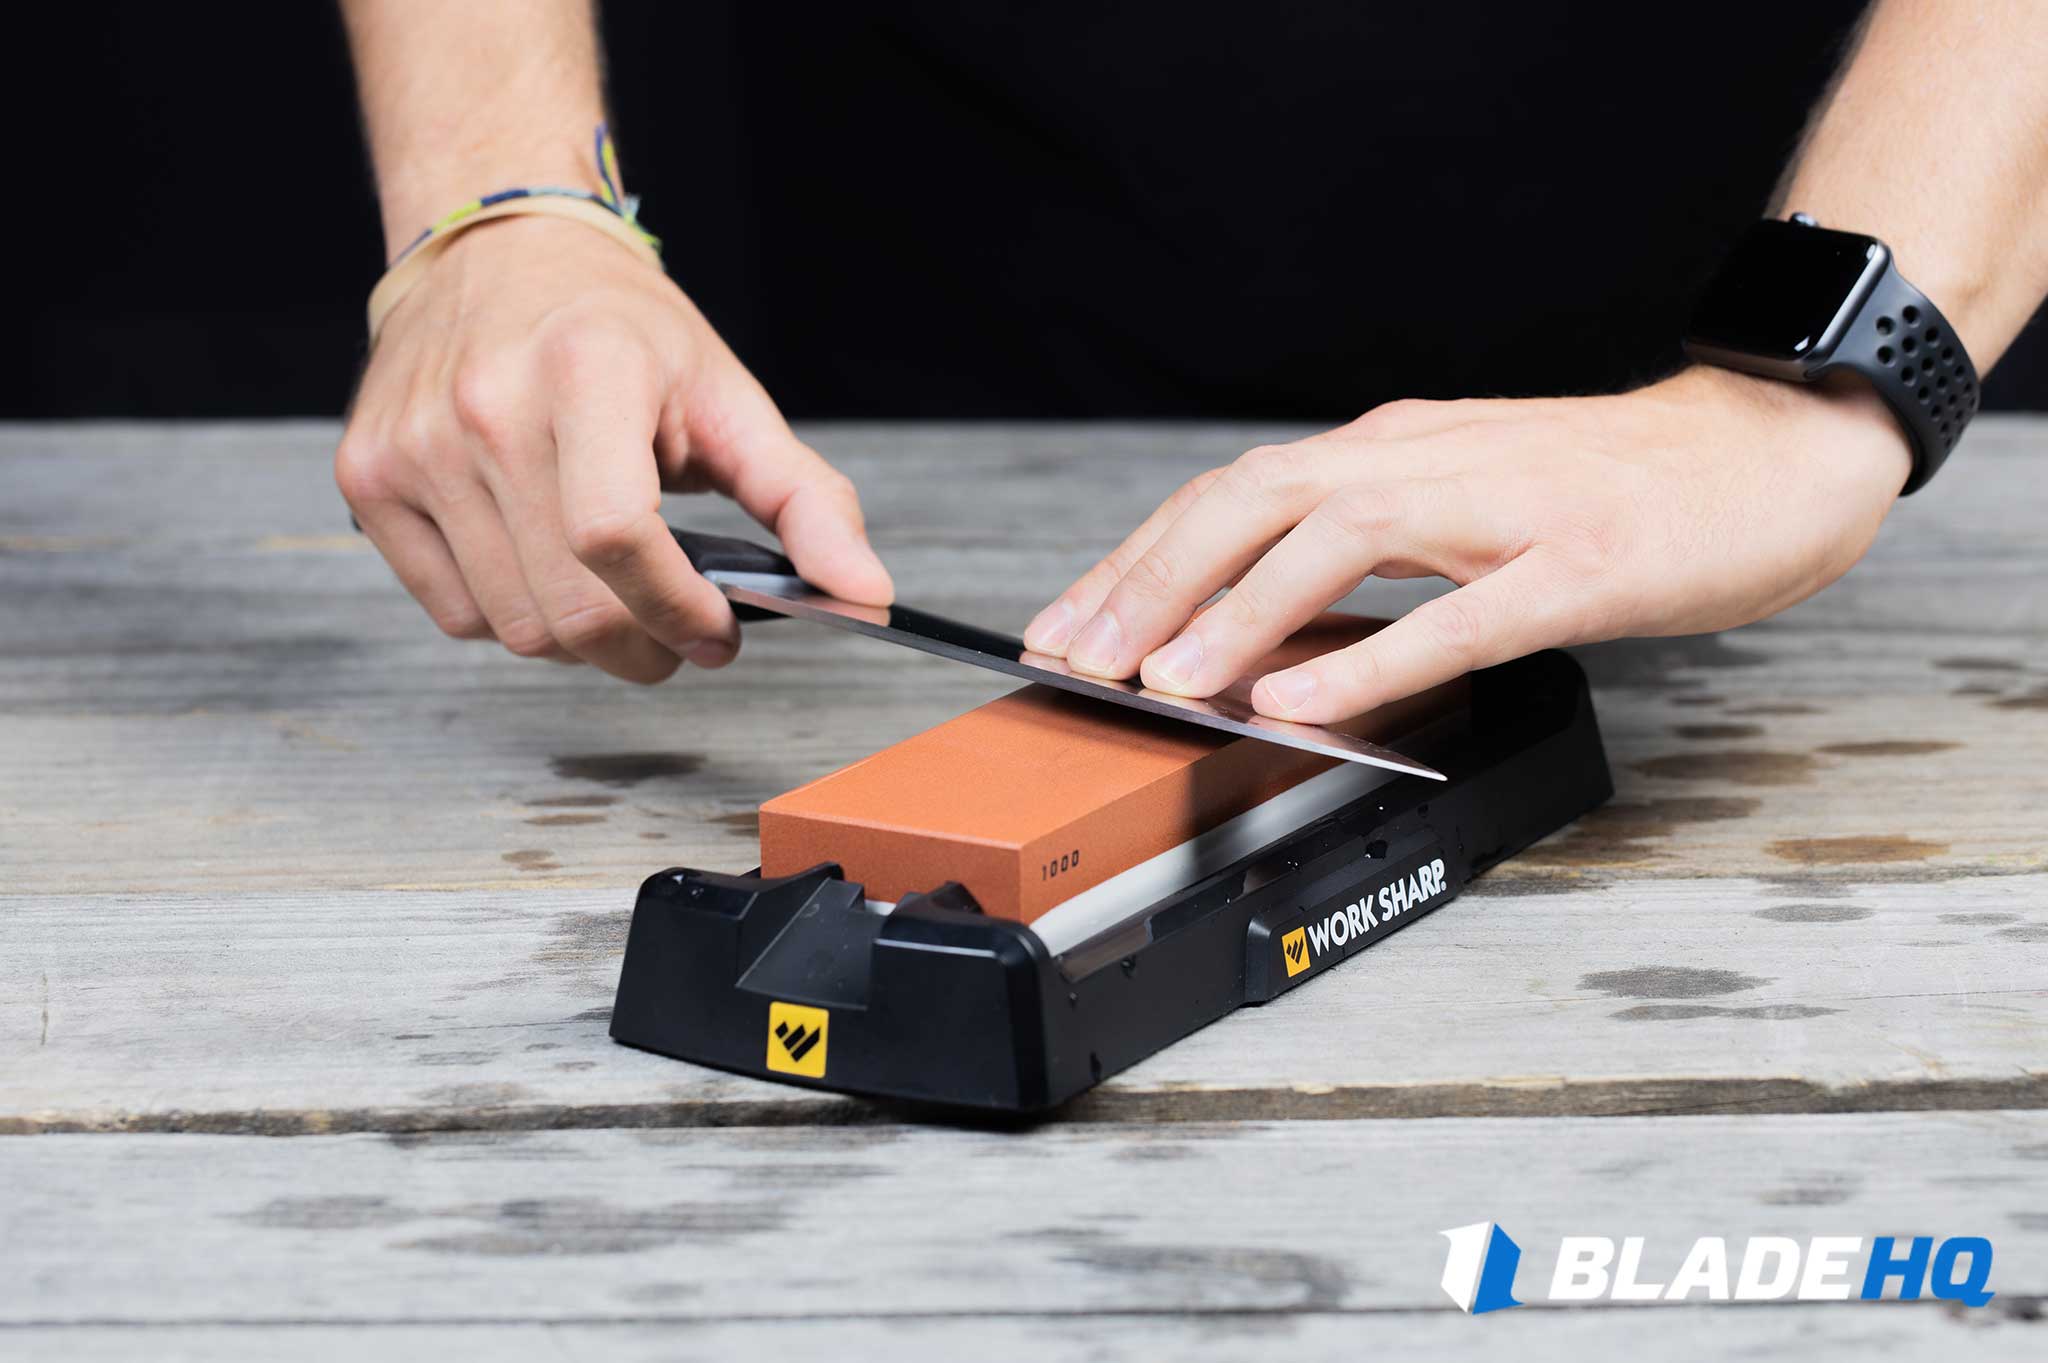
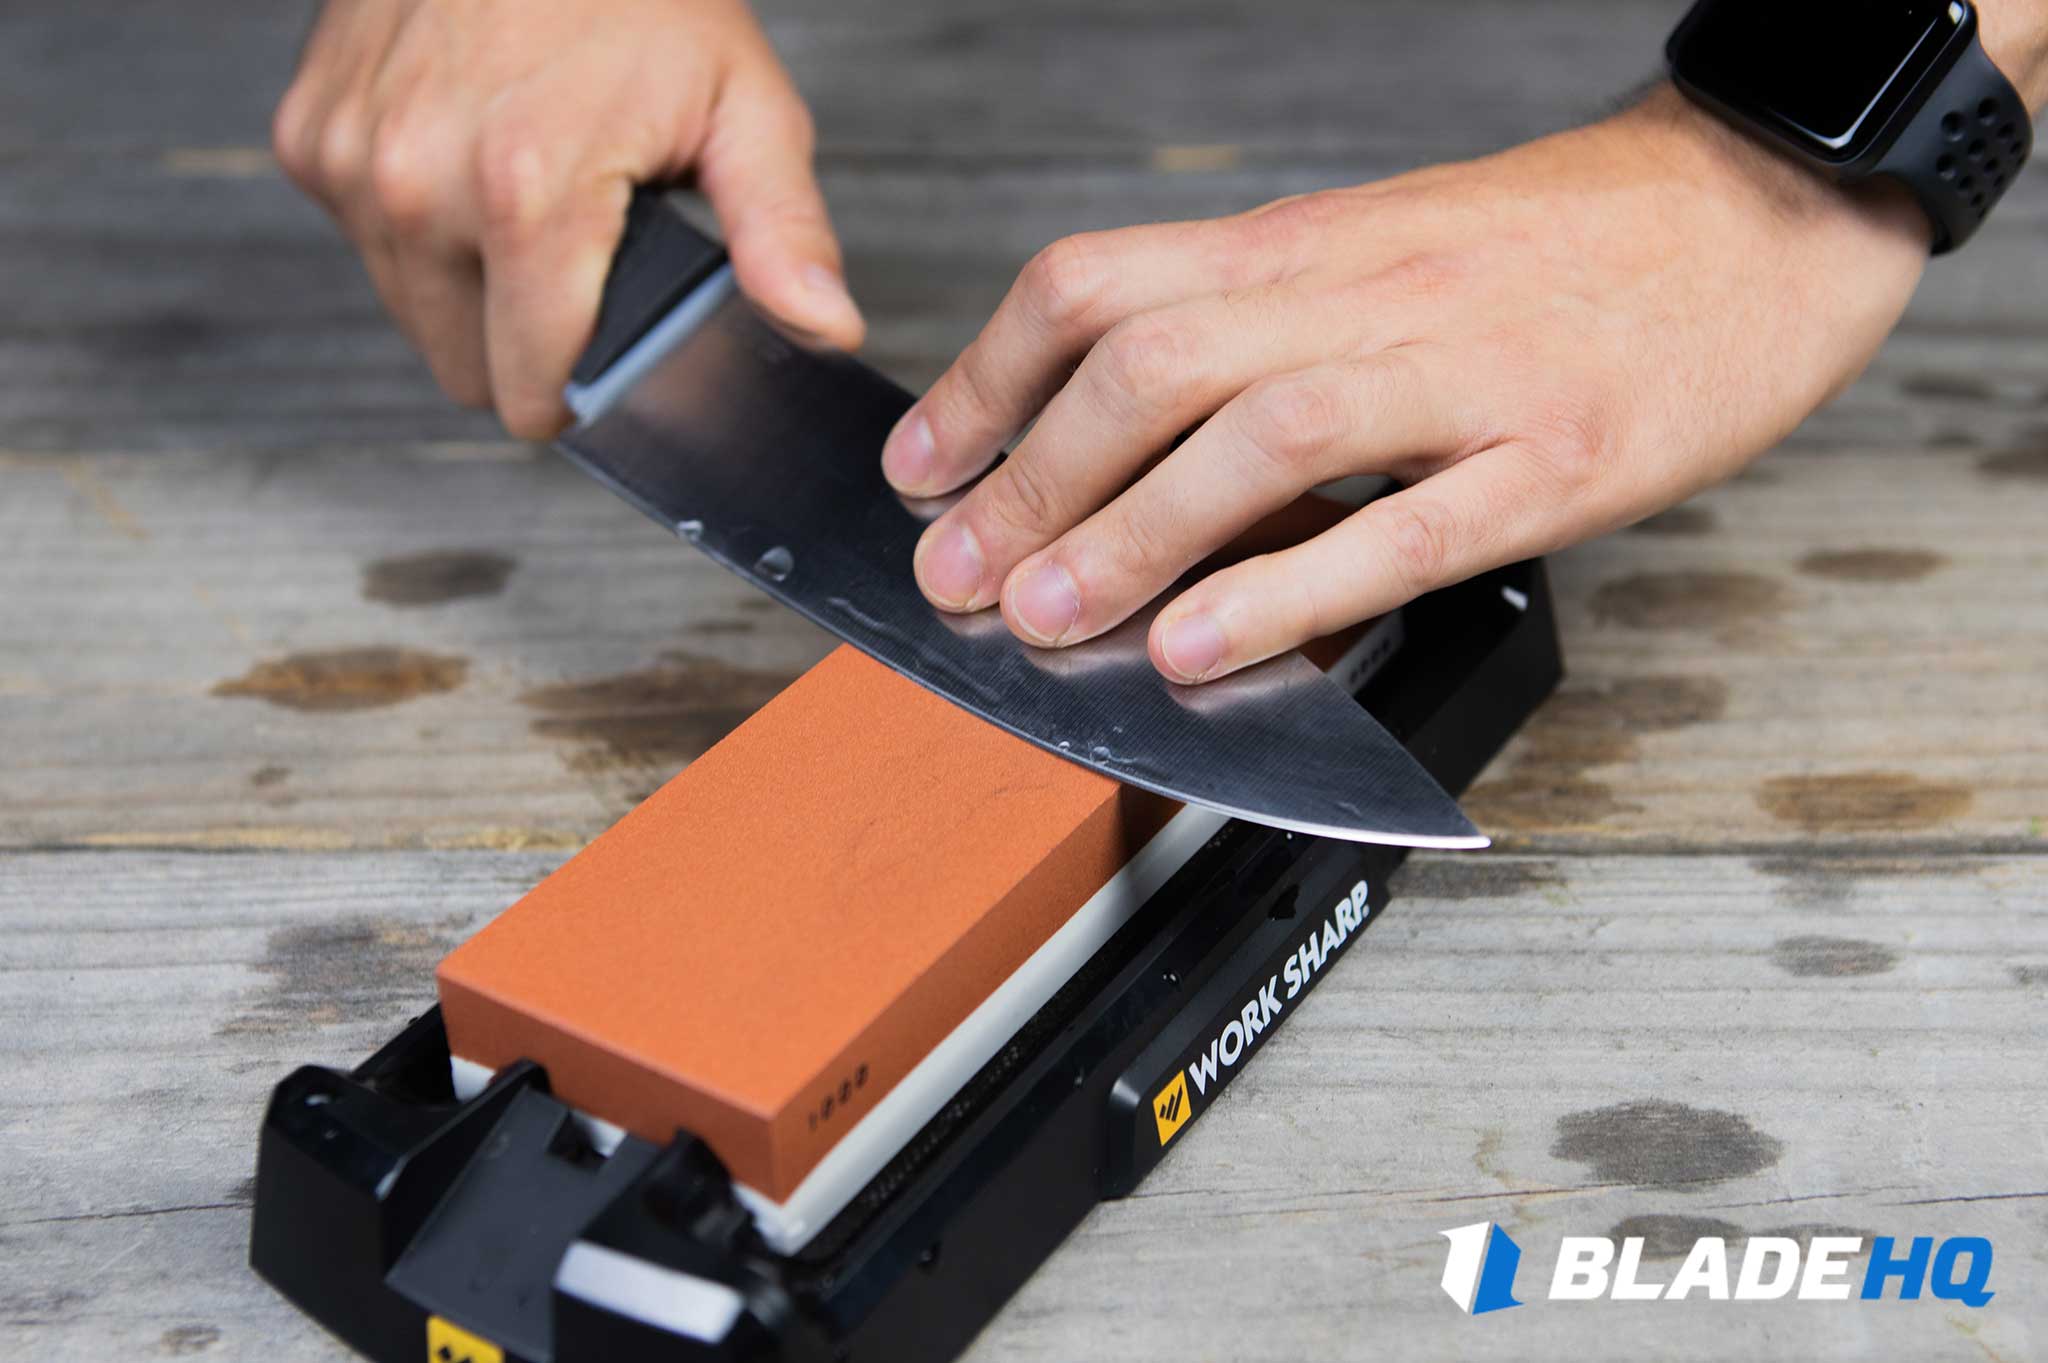
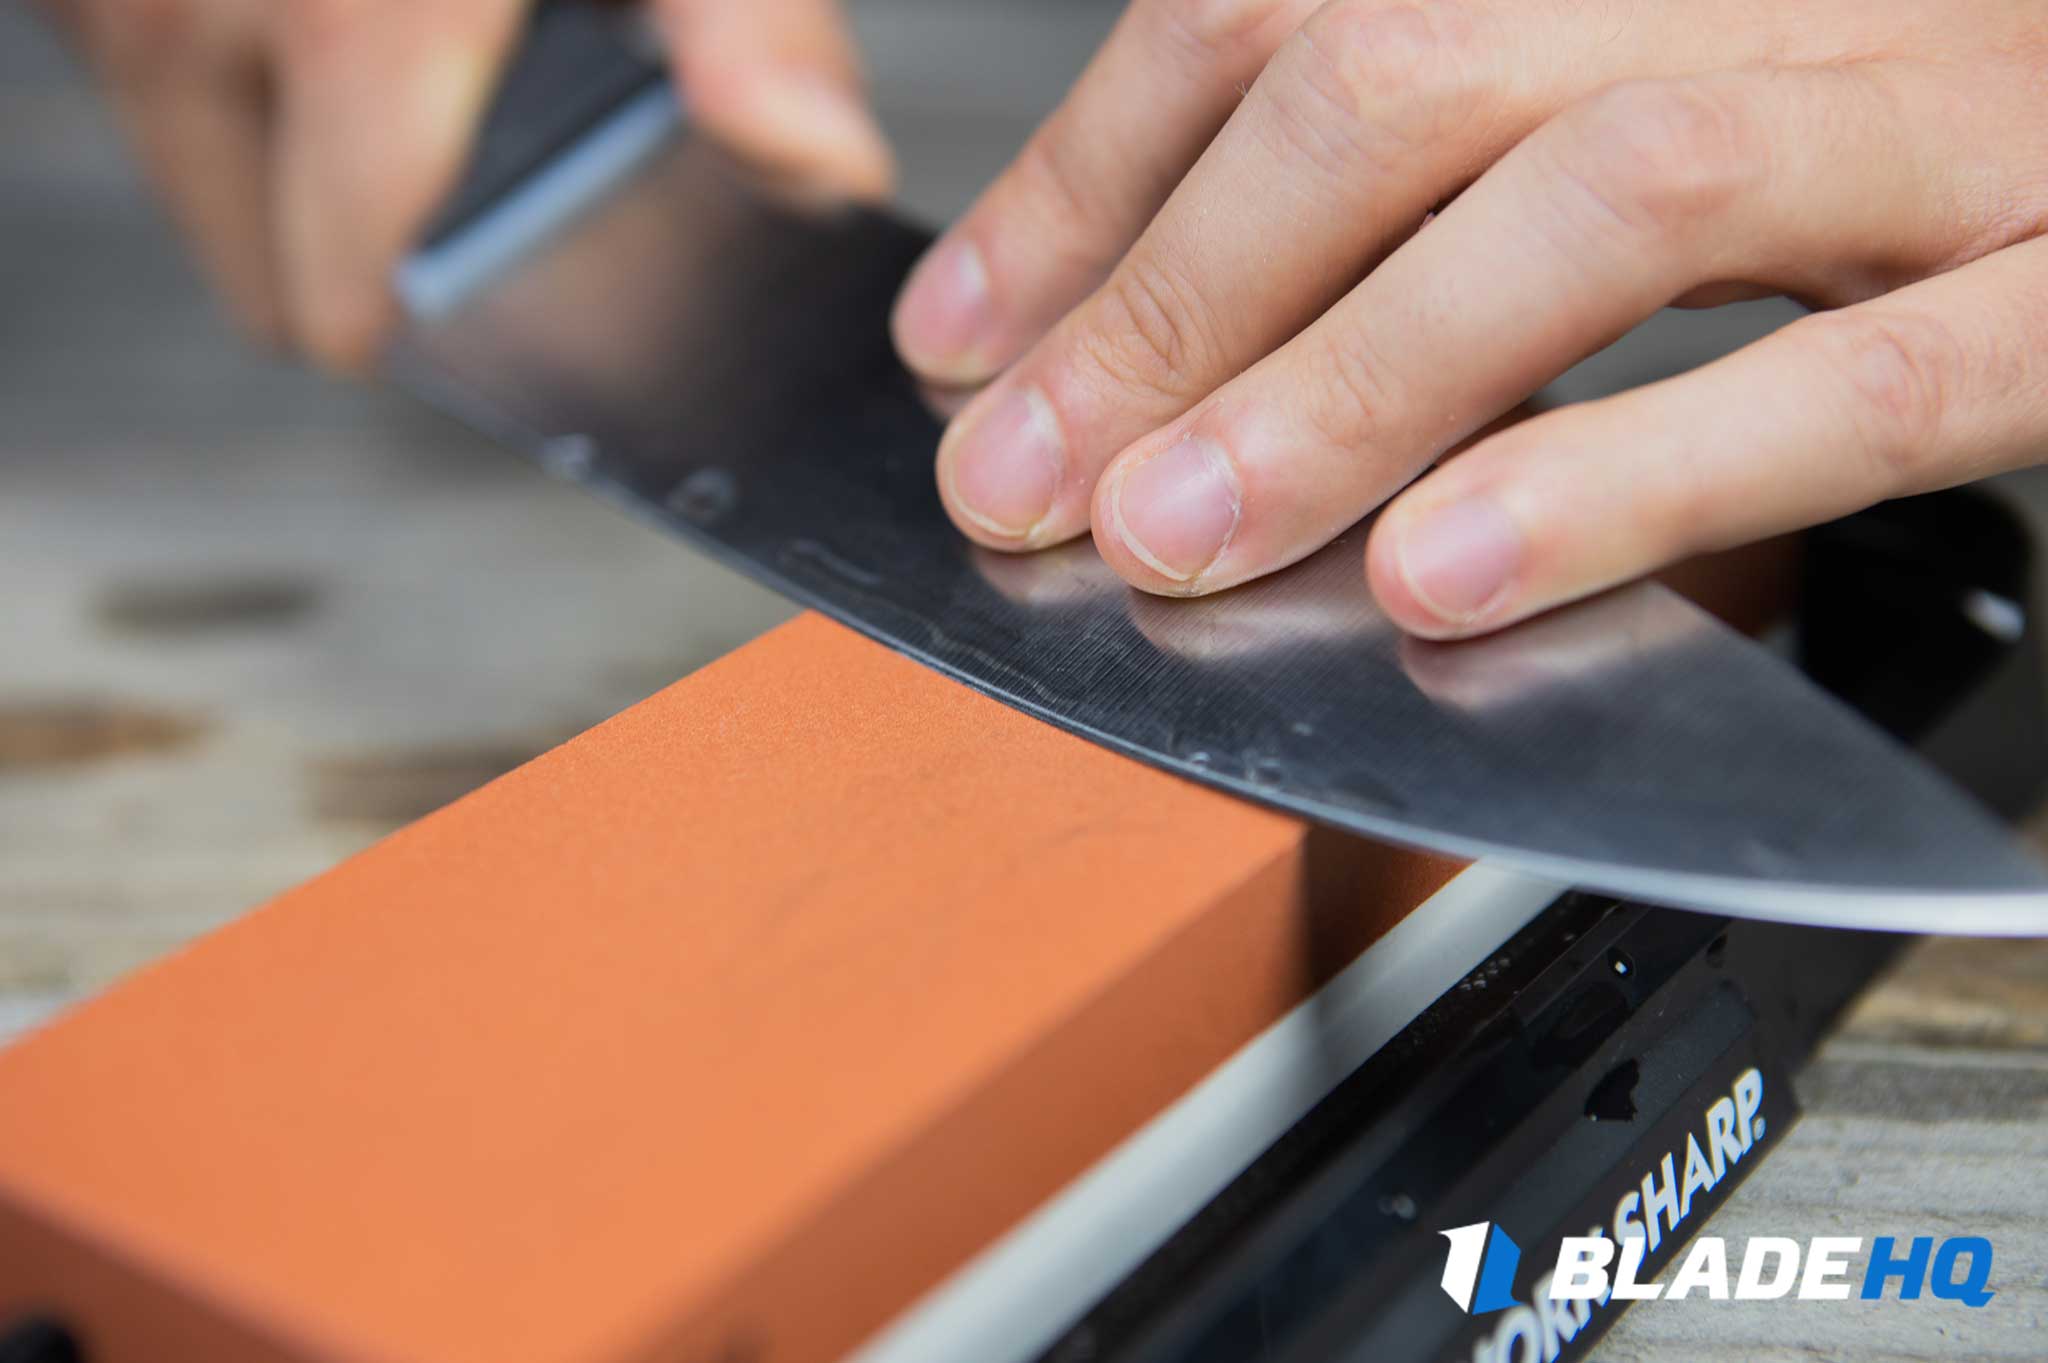
- With your other hand, place light and consistent pressure on the blade then glide the knife along the whetstone from heel to tip making sure to stop the tip on the flat part of the stone to minimize rounding. Flip the knife over and repeat.
- Make several passes on each side of the knife then check for edge consistency and any remaining imperfections. If there is still visible damage, repeat this process until it is no longer visible.
- Progressively sharpen your knife with finer grit sharpening stones until there is no visible damage and the edge is smooth and consistent.
- When your knife is sharpened to your liking, use a leather strop to remove burrs and fine imperfections.
Final Thoughts
Sharpening a knife is an invaluable skill that all knife nerds should possess. The ability to take a dull, unsafe knife and give it new life is worth all the time and effort it takes to learn. If you’re someone who cooks at home or has a job in a kitchen, maintaining your tools is the most important thing you can do with your time.
Not only is a sharp knife a safe knife, it is a tool that makes prep work and other cooking tasks much faster and more efficient. Check out our full selection of cooking knives and sharpening supplies by clicking below.
Learn more
Check out our Learn Knives section for more great Kitchen Knife articles including, Best Chef Knives, Best Kitchen Knives, and Best Kitchen Knife Sets.The most important part of sharpening a kitchen knife is having a kitchen knife to sharpen. Our selection of kitchen knives at Blade HQ is continually growing. Check our site regularly to see what we have in stock, and check out this episode of Knife Banter where we look at some awesome kitchen knives for knife guys.
OTHER KNIFE GUIDES
Still in that information gathering phase? We have tons of knives to choose from and lots more articles to read! Happy hunting and may you find that one special knife of your dreams!