Are you curious about anodization? After reading this guide on anodizing the almighty titanium, you will know the ins and outs of the anodizing process. With a few inexpensive tools you can even do your own anodization at home in your garage.
Anodizing occurs by augmenting the oxide level on the surface of metal, giving it the look of different colors. Unlike traditional DLC or powder coating, anodization is not a coating at all. It’s extremely durable and long-lasting, but it can also be easily removed if desired. Fun fact: beyond just looking cool as all get-out, anodization increases material surface hardening for greater resistance against scratches and scrapes.
Every knife is more fun with some anodization, so less talking and let’s do it!
WHAT IS ANODIZATION?
Taken directly from Wikipedia (we love you, Wikipedia), anodization is “an electrolytic passivation process used to increase the thickness of the natural oxide layer on the surface of metal parts. The process is called anodizing because the part to be treated forms the anode electrode of an electrolytic cell. Anodizing increases resistance to corrosion and wear and…can also be used for a number of cosmetic effects.” In a nutshell for knives, anodizing turns titanium cool colors!
WHICH METALS CAN BE ANODIZED?
Although many metals can be anodized including magnesium, zinc, niobium, and tantalum, anodization is popular within the knife industry for its applications with titanium and aluminum. Knife handle scales and hardware (screws, pocket clip, backspacer, etc.) are frequently anodized to create a dynamic color contrast.
Our guide today is only applicable to the anodization of titanium. Aluminium anodization is a completely different process from titanium that involves etching, dyeing and sealing.
WARNING
Whoa there. Hold it buddy.
Before you disassemble your knife and start anodizing, there’s some stuff you need to understand. Anodization is a simple process but if you do it wrong the consequences could be dire. The following steps involve electricity and chemicals that could cause you significant injury or even death! Take proper precautions and do your own independent research.
Disassembly or modification of your knife will likely void your warranty. Blade HQ is not responsible for any damage or injury sustained from the knowledge gained in this guide.
ANODIZING GEAR CHECKLIST
- Anodizing power supply (9V batteries can be used)
- Non-reactive containers (3 minimum)
- Simple Green or other degreaser
- Ultrasonic cleaning machine
- Whink Rust Stain Remover (low strength acid)
- Borax (as electrolyte)
- Scrap metal
- Gloves
- Acetone
- Paper Towels
TITANIUM ANODIZING PROCESS
- Clean and prepare workspace
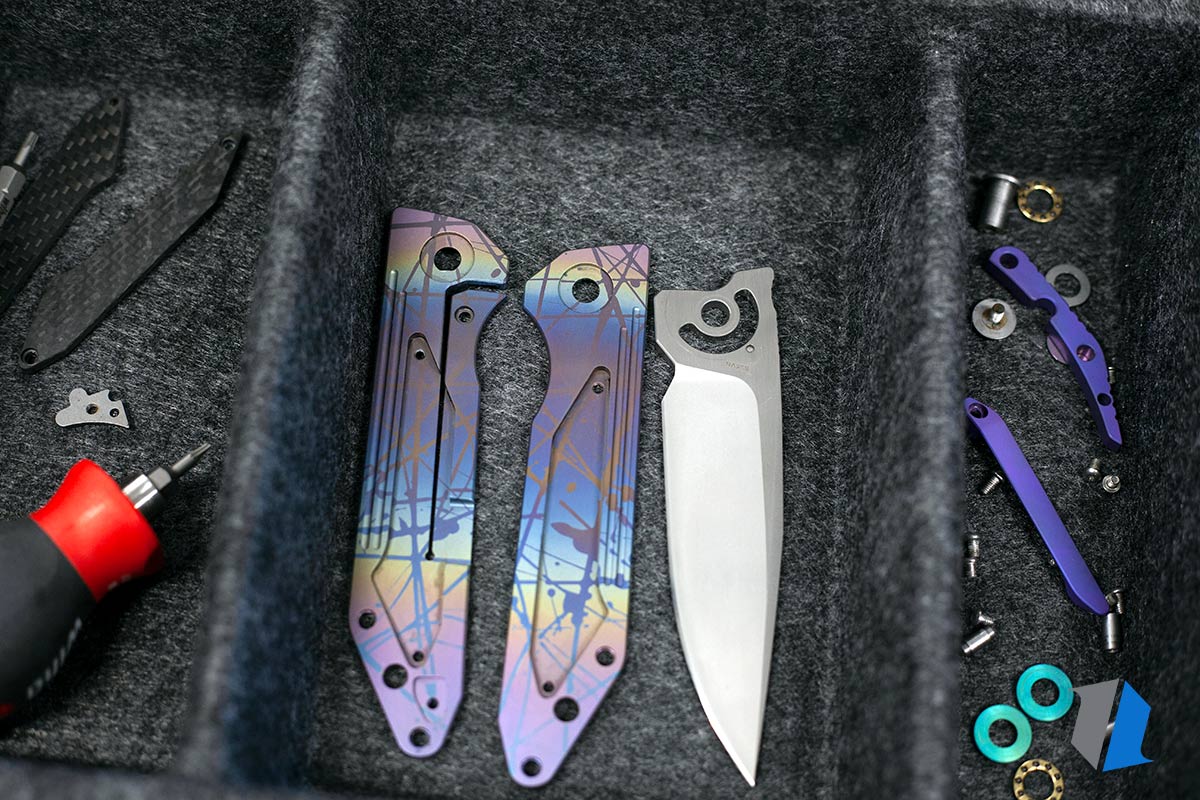
- Disassemble knife as necessary
- Clean parts with Simple Green in an ultrasonic cleaning machine (optional but recommended)
- Rinse clean parts in water (wear gloves to ensure no oils are transferred to the parts)
- Dip knife parts in Whink for 15-30 seconds to remove any prior anodization
- Prepare a Borax electrolyte solution in non-reactive container
- Put a piece of non-rusting metal into the solution and connect the negative electrode to the metal piece
- Suspend the knife parts in the solution from a non-reactive wire (we used titanium)
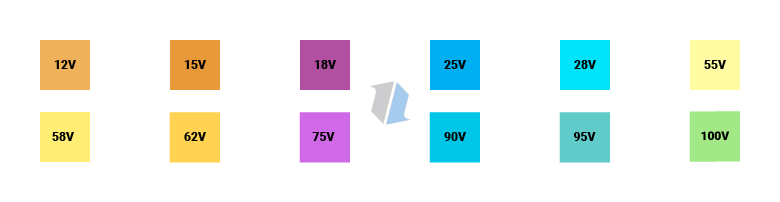
- Choose voltage based on desired color (see chart below)
- Turn on voltage machine
- Connect the positive anode and wait until amperage stabilizes
- Disconnect anode and turn off power supply
- Confirm anodization success
- Rinse to clean off the electrolyte solution
- Reassemble your knife!
For quick reference, the steps above should be just fine. If this is your first rodeo, you’ll want to read the full breakdown below.
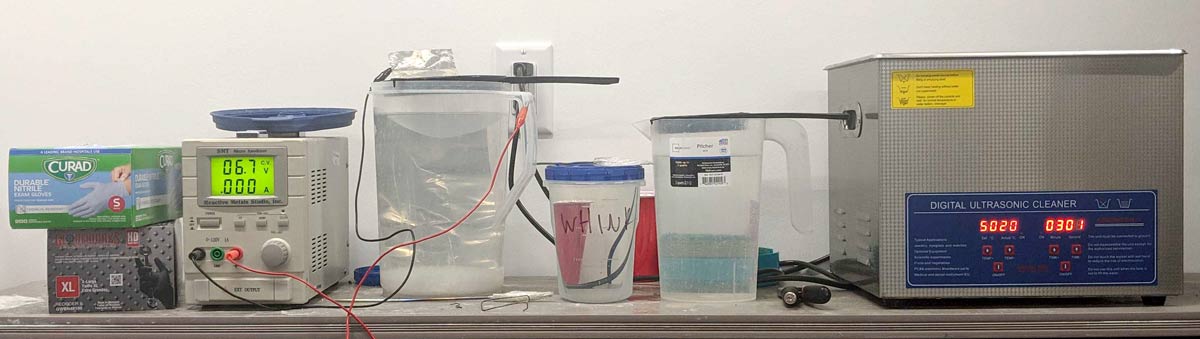
First things first–you need to have a clean, organized work station. I recommend putting your ultrasonic cleaner on one side, followed by your rinse bath, Whink, and then your electric power supply. Keep the paper towels close by so you can dry off your parts between dunks.
Removing anodization is simple enough. First, we clean our parts in the ultrasonic jewelry cleaner. Yep–that’s a full bottle of Simple Green in there. This ensures that there are no oils anywhere on the parts. You could clean the parts manually with the Simple Green or rubbing alcohol, but an ultrasonic cleaner ensures the parts are perfectly primed for the next steps. Give your parts a quick rinse in water before moving to the next step.
After cleaning, the parts go into a low-strength acid bath to remove any previous anodization treatments. We use a product called Whink which is marketed as a rust and stain remover. Don’t breathe this stuff in. Work in a well-ventilated space. Take Whink seriously.
Don’t leave your parts in too long. The anodization should be gone within 15-30 seconds. You should see some bubbling at the surface of the titanium. That’s your sign to STOP!
If your parts are bare titanium, it can still be a good idea to go through this acid step. Some titanium already has an oxide layer built up that can make anodizing unpredictable at higher voltages (50+ volts). A bath in some low-strength acid will make your anodized colors more vivid. You know the drill–clean your parts well before moving on to the next step.
Now it’s time to anodize! I’m gonna say right off the bat, don’t do any of this without proper knowledge of what you’re doing. It can seem really simple, but if you mess up we’re working with enough power to end your life. Do some research. Be smart. Use your noggin. Watch like 178 different YouTube videos and read tutorials on random forum websites that no one has visited in 12 years.
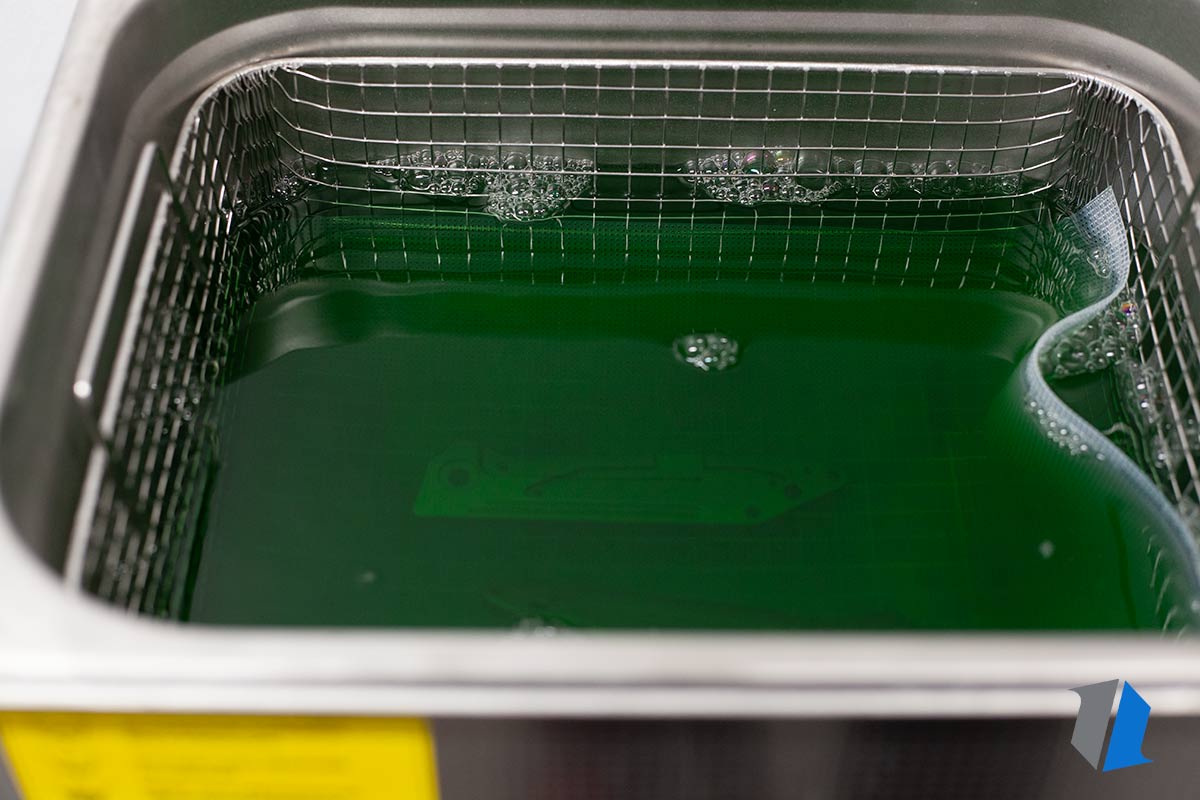
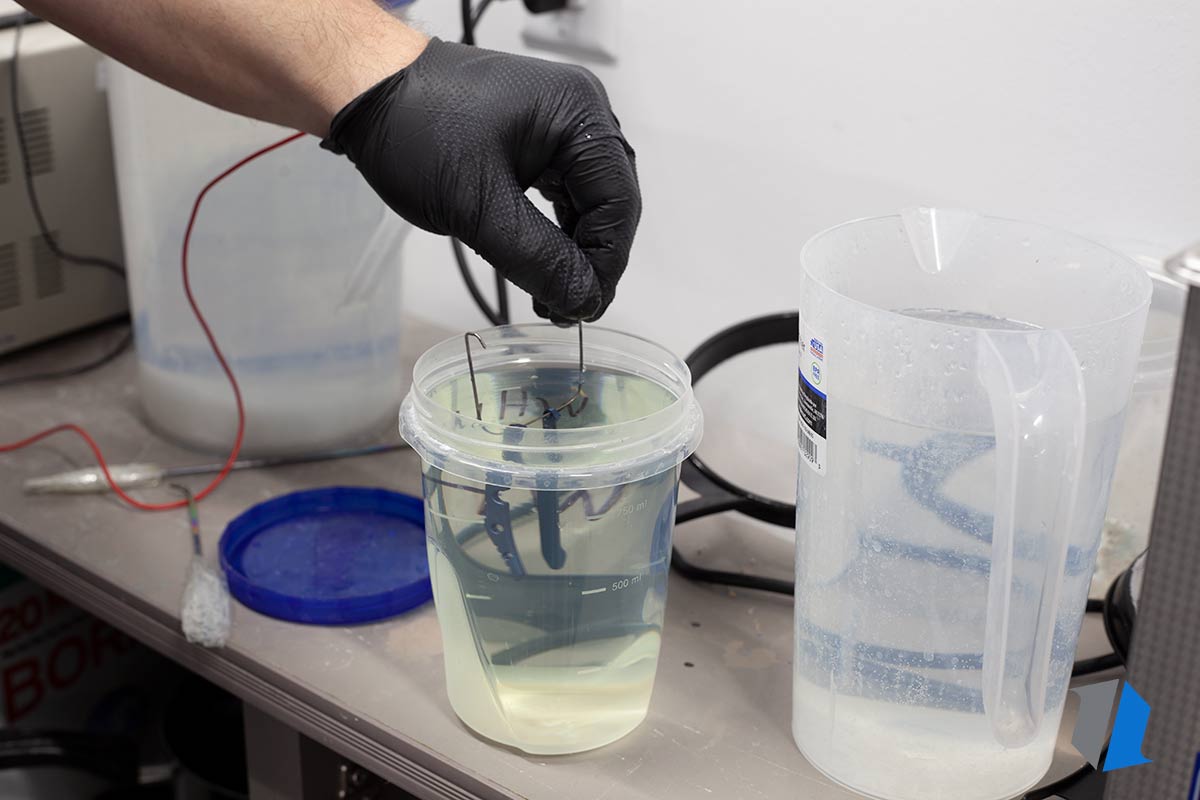
We suspended our parts fully submerged into a Borax electrolyte solution in a non-conducting container from a piece of scrap titanium. Reactive metal (not titanium) will take current away from the piece you’re trying to anodize. You’ll need a piece of scrap metal in the electrolyte solution to serve as a cathode. This piece of metal should ideally be larger than your work piece. We connected our negative electrode to the non-reactive metal and the positive electrode is connected to the titanium anode (wire that is holding our parts).
Now is the moment of truth! Turn on your anodizing machine and set your voltage based off your desired color. Refer to our titanium anodization chart to dial in your colors. If you’re not sure what voltage to use, start low! Higher voltages will build up on top of lower voltages. If you want to go back down to a lower voltage, you’ll have to dunk your parts back in the acid solution first.
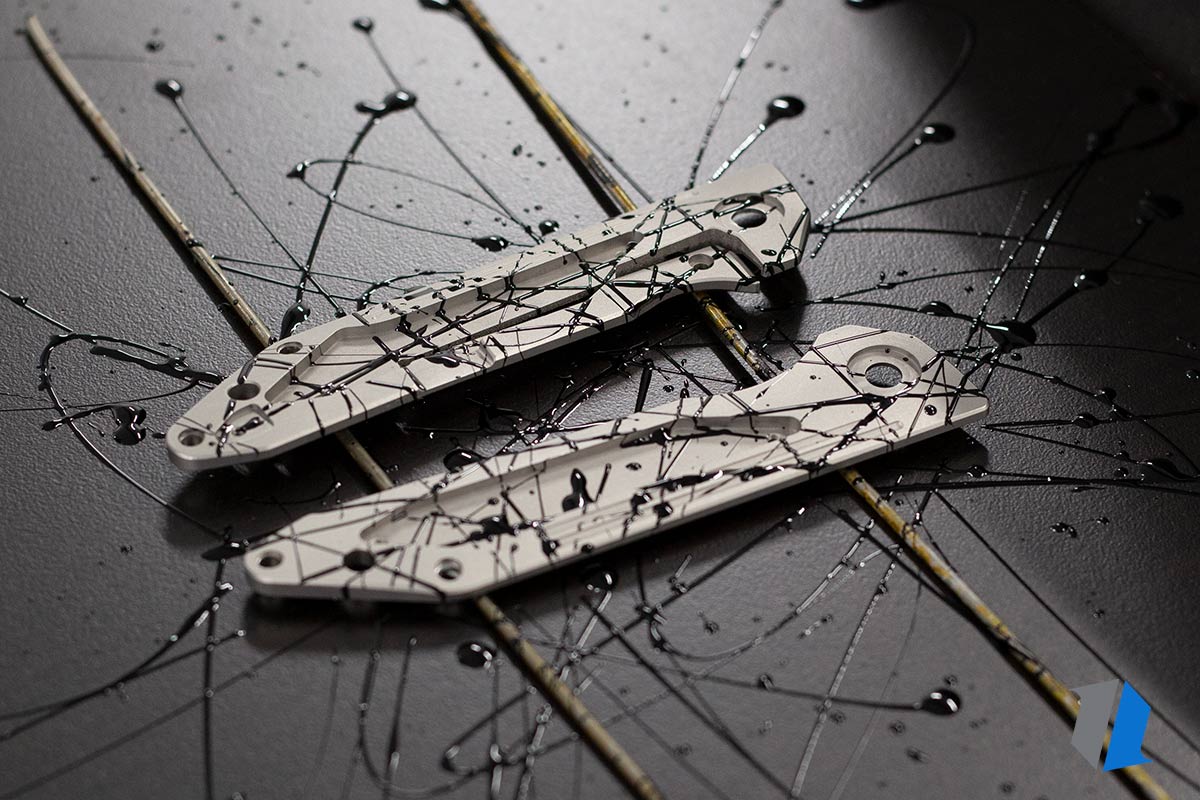
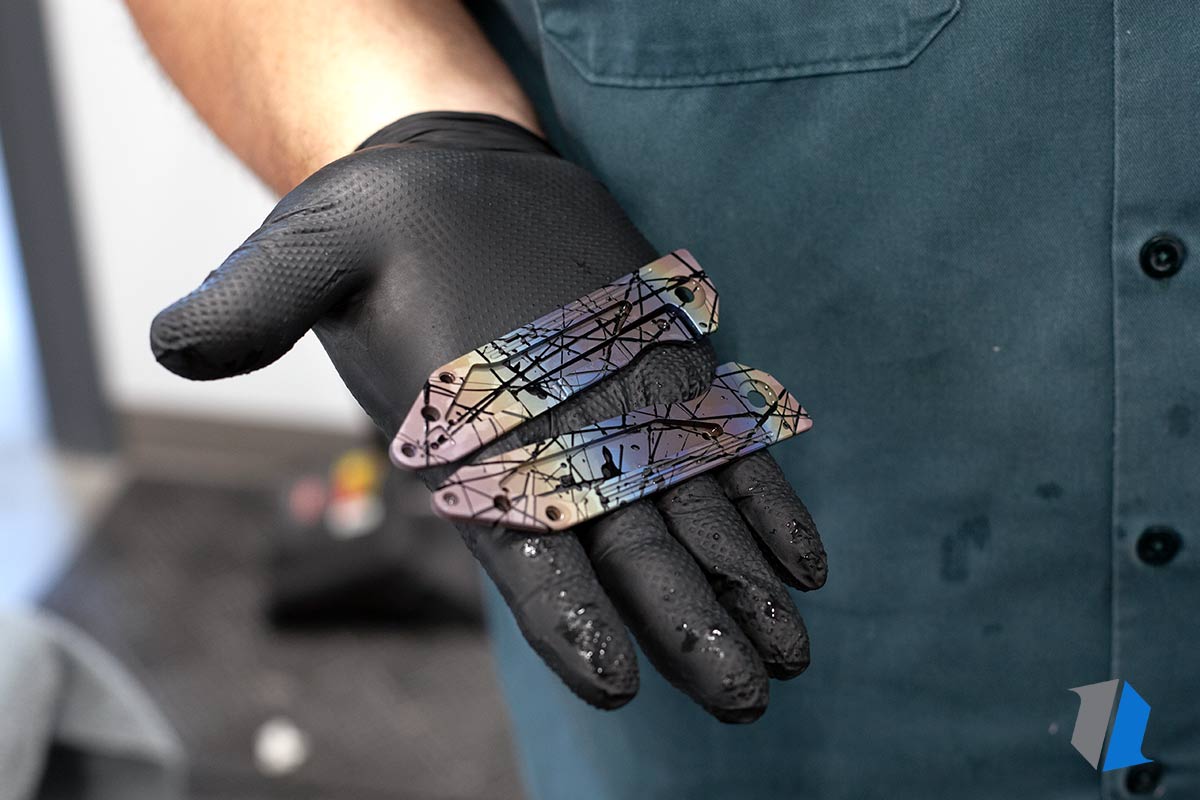
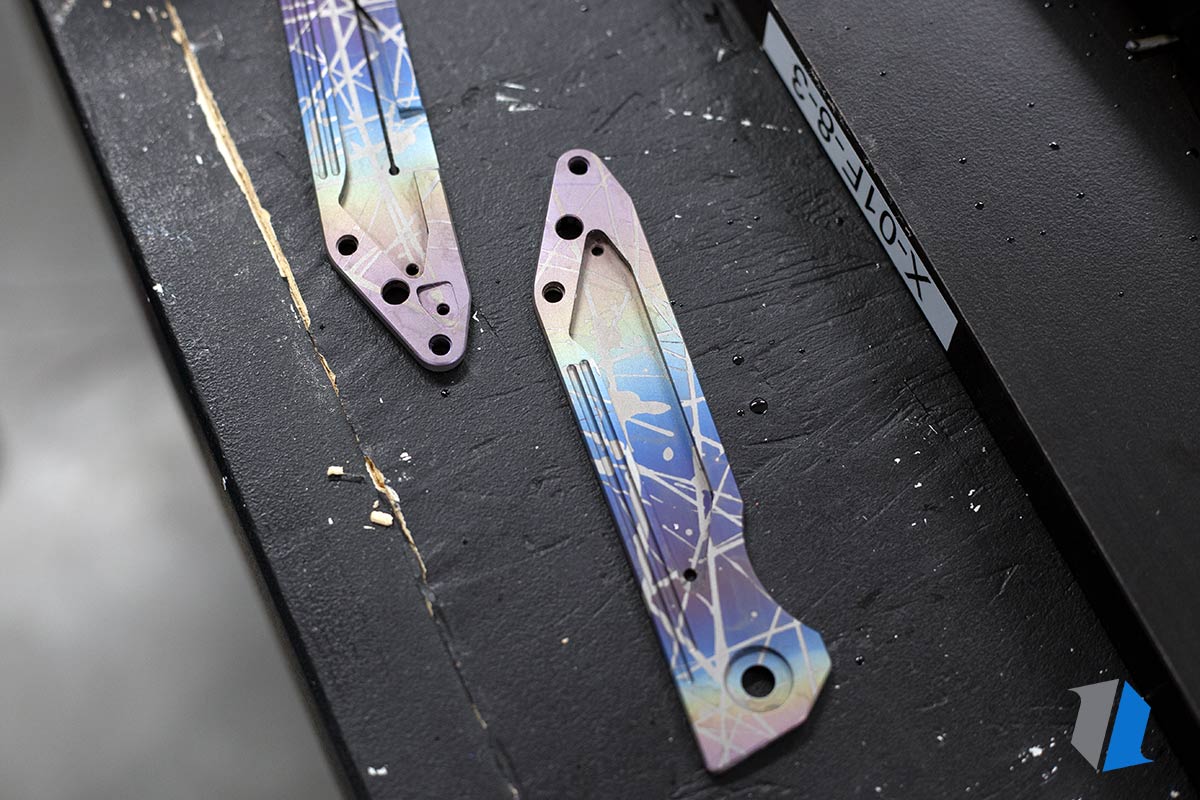
I can tell already your knife is going to look great! You can achieve so many different effects through masking. On the knife pictured here we used nail polish to mask off a splatter pattern. Remove the nail polish with acetone to reveal a blank canvas underneath. Vinyl or tape work great to make patterns and professionals utilize lasers to apply patterns digitally.
We’ve warned you a million times already in this article that there are dangers associated with anodization. Be smart. Don’t void your knife’s warranty unless you’re 100% sure it’s something you’re comfortable with.
There’s a ton of great information out there when it comes to anodization. All this stuff is pretty simple, but make sure you understand the process completely before trying it yourself.
ANODIZING WITH 9V BATTERIES
If you want to anodize your gear as cheaply as possible, all you need is a couple 9V batteries. It’s gonna take a little bit of math to get your colors all figured out. Connect your batteries in series and each one will bump your voltage, you guessed it, 9 volts. We’re lucky enough to have a dedicated power supply on hand for anodizing, but batteries will work just great! Check out the video below for an example of anodizing with batteries.
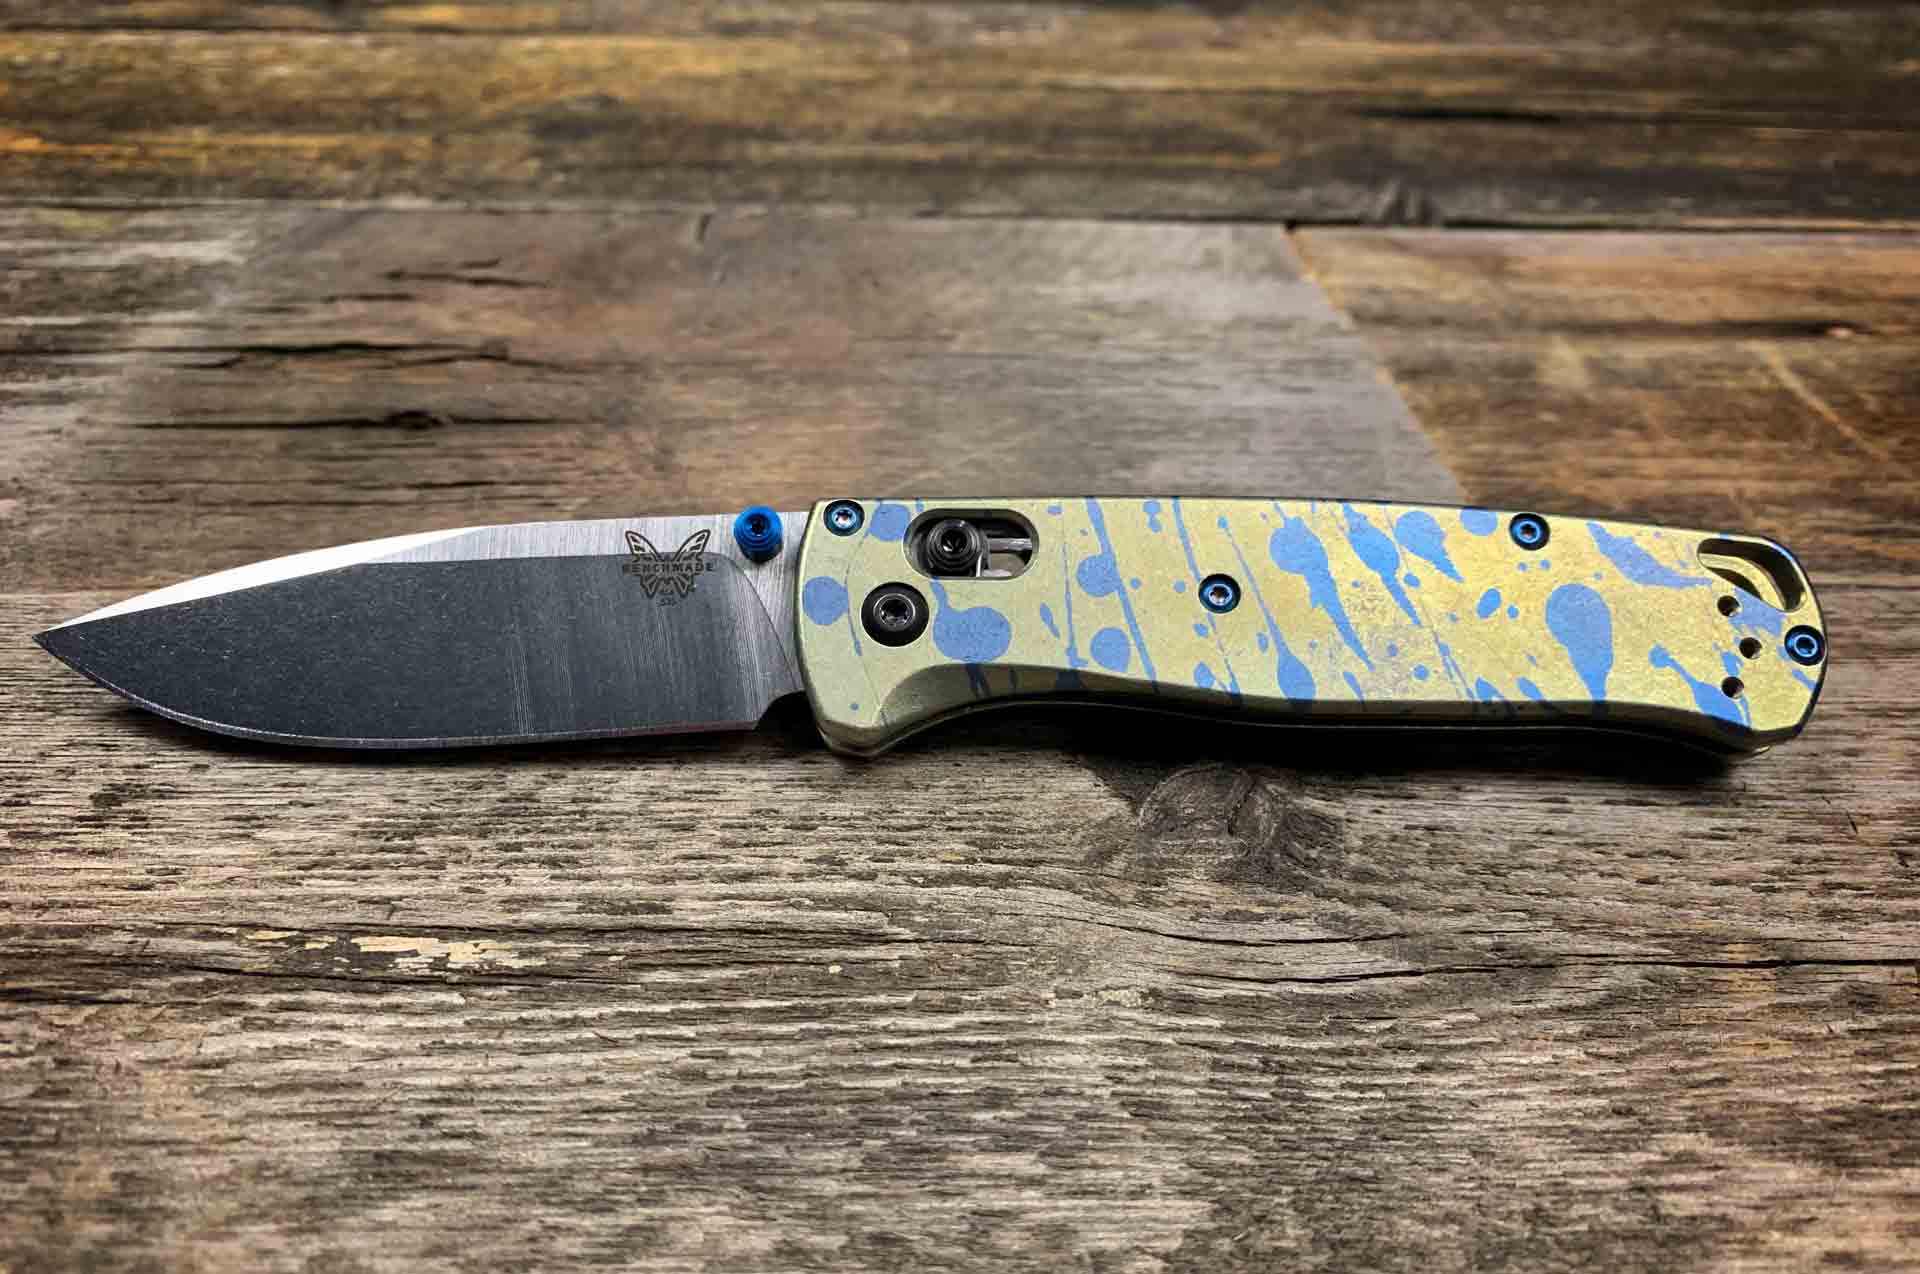
Anodizing with 9V batteries is a breeze! This is what I was able to do with my Bugout and Flytanium scales in just an afternoon. Just follow the video above and you can have a simple anodizing setup for about $15, depending what you have around the house.
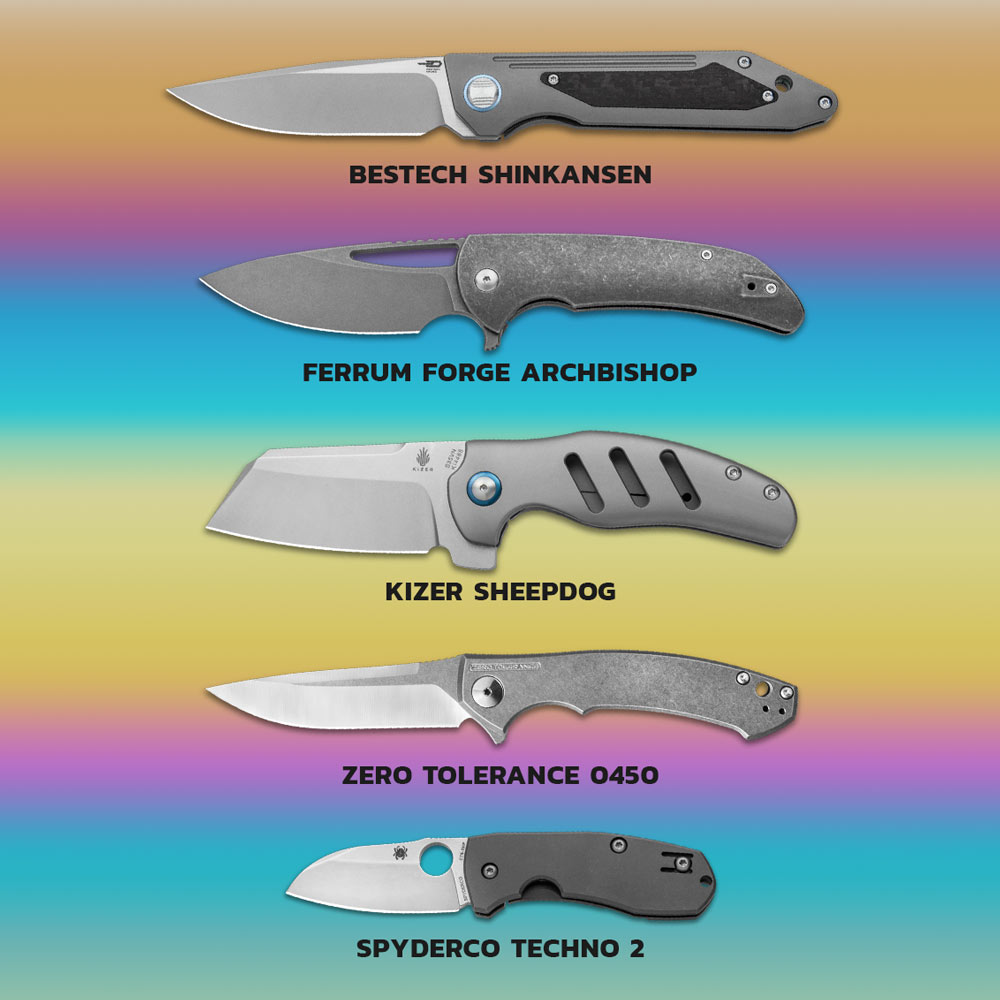
5 GREAT KNIVES TO ANODIZE
All 5 of these knives feature sweet titanium scales that are perfect for anodizing.
Click the knife of your choosing below to see the specs!
CONCLUSION
Anodization is a really fun and simple way to amp up the personality on your EDC (did you get that pun? I said AMP). Compared to lots of hobbies, anodization is cheap, uncomplicated, and easy! Hopefully your dreams of an anodized world feel within reach now that you’ve read this guide. If you anodize your knife, tag us on Instagram. We would love to see what you’ve whipped up!
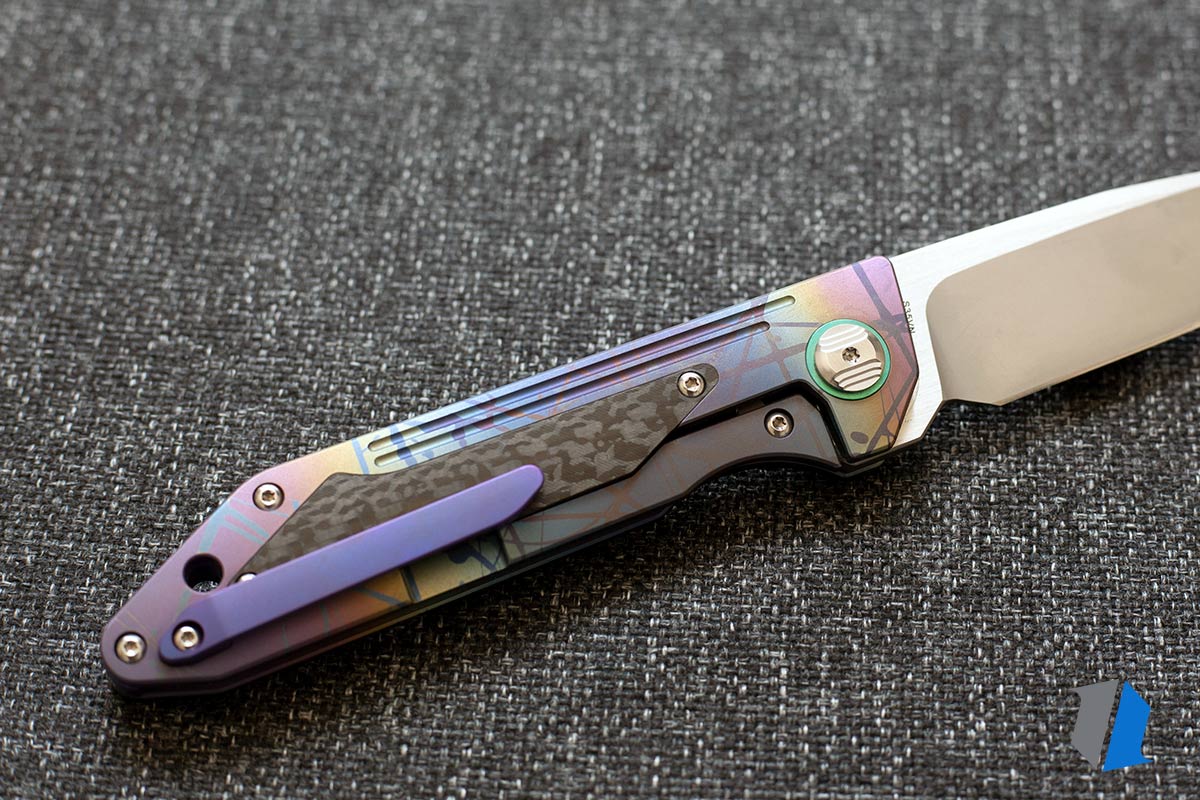
The knife we used for this guide is the Bestech Shinkansen.
OTHER KNIFE GUIDES